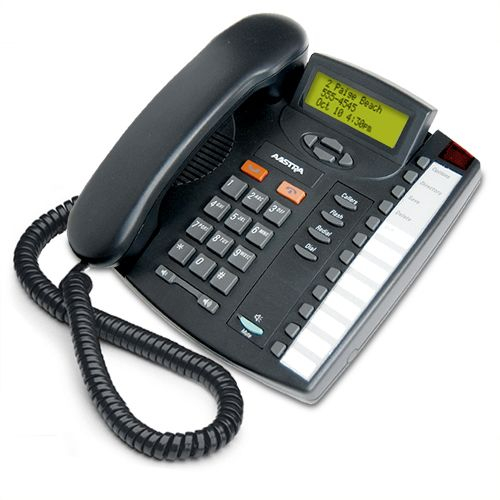
The Aastra 6731i IP phone offers advanced features, including 10 fixed feature keys, HD wideband audio…
Setting The Date & Time On The Aastra 9116LP Phone
To learn how to set the date and time on the Aastra 9116LP phone, follow these steps.
If you subscribe to the Caller ID service from your telephone company, the date and time are set automatically after you receive your first incoming call. If you do not subscribe, you must set the date and time manually.
To set the date and time:
- Press Options.
- Press UP (▲) or DOWN (▼) until the display indicates Set Time/Date.
- Press Save. Display shows time and date. Use UP (▲) and DOWN (▼) to adjust the flashing time and date and LEFT (◀) and RIGHT (▶) to move to the next field. To change the AM/PM indicator, adjust the time ahead by 12 hours.
- Press Save.
To resume the automatic date and time setting (if the date and time has been set manually), disconnect the power supply (or the line cord if the phone is PBX powered), then reconnect it. After your first incoming call, the date and time are automatically set if you subscribe to the Caller ID service from your telephone company.
And that is how you set the date and time on the Aastra 9116LP analog phone. For further information, please see your system administrator.
For a vast selection of new and refurbished business phones and telephone equipment from leading manufacturers such as Aastra, please visit Startechtel.com or call 800-564-8045. You may also connect with us on Facebook, Google+, Twitter, LinkedIn, and Pinterest.


Tags: Aastra 9116LP Phone, Aastra Analog Phone, Follow these steps, How to set date/Time


