How To Answer & Make Calls On The Avaya 9608 IP Phone
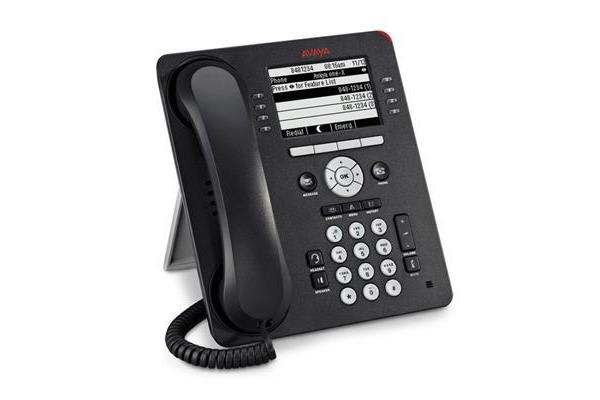 The Avaya 9608 IP phone is ideal for various office environments. Special features of the Avaya IP phone include built-in full duplex speakerphone and built-in headset interface, dual message waiting indicators, and wideband audio. Delivering exceptional performance and features, the aptly designed Avaya IP phone is perfect for employees who are always on the phone. Follow these steps to learn how to answer and make calls on the Avaya 9608 IP phone.
Answering A Call
You may answer an incoming call in one of the following ways:
- If you are not on another call, lift the handset, or press Speaker, OK, or Answer to answer the call using the speakerphone, or press Headset to answer using the headset.
- If you are on another call, and the phone displays the incoming call, from the Phone screen scroll to the line with the incoming call and press Answer or OK. If you are on another call, you can also press Ans Hold to automatically put the first call on hold when you answer the new call. Also, you can press Ans Drop to automatically drop the first call when you answer the new call.
- To quickly move to the top of your call appearance list is to answer an incoming call on your primary line, from the Phone screen press the Phone button. You can then press the line for the incoming call or scroll to it.
- To automatically display the Phone screen when you receive an incoming call, set the Phone Screen on Ringing option to Yes.
Making A Call
- Lift the handset, or press Speaker or Headset (if applicable) or a line button for an available line.
- Dial the number you want to call.
Making A Call Using Edit Dialing
- From the Phone screen, enter the number you want to call.
- To edit the number, press Bksp to erase the previous character, one character at a time. To remove the entire number, press Clear.
- Press Call or OK.
And that is how you answer and make calls on the Avaya 9608 IP phone. For further questions, please see your System Administrator.
To shop our selection of new and refurbished phone systems and telephone equipment, please visit Startechtel.com. To speak with a representative directly, please call 800-564-8045. You may also connect with us on Facebook, Google+, Twitter, LinkedIn, and Pinterest.
Posted in Avaya, Business Communications, IP/VoIP Phones | Comments Off on How To Answer & Make Calls On The Avaya 9608 IP Phone
Cisco IP Phone 7942G: Conference Calls
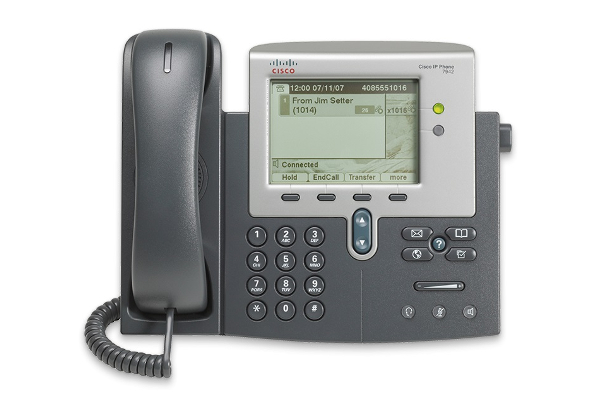 Conference calls are important for businesses as they allow for easy collaboration between remote parties. For those tasks that do not necessitate meeting in person, yet require some discussion, conference calls can be a great help.
For successful conference calls, you want to utilize quality business phones that possess the appropriate features and functions. The Cisco IP Phone 7942G is ideal for this. Aside from its attractive design and advanced features, you can easily conduct Cisco conference calls. To learn how, follow these steps.
To create a three-party conference call:
- During a call, press the more soft key and then the Confrn soft key to open a new line and put the first party on hold.
- Place a call to another number.
- When the call connects, press Confrn again to add the new party to the call.
To establish a conference call between two- and three-party calls to a Cisco Unified IP phone, one active and the other on hold:
- Press the Confrn soft key on the Cisco Unified IP phone.
To establish a conference call between second- and third-party calls already present on a Cisco Unified IP phone, using separate line buttons, one active and the other on hold:
- Press the Confrn soft key on the Cisco Unified IP phone.
- Press the Line button of the call you want to add to the conference.
*Note: Your system administrator must have configured the system for three-party or eight-party ad-hoc conferences.
To place a MeetMe conference call:
- Obtain a MeetMe conference number from your System Administrator.
- Distribute the MeetMe conference number to all the participants.
- Go offhook, press the MeetMe soft key, and dial the MeetMe conference number. All other participants join the meeting by dialing into the MeetMe conference number.
- To end the MeetMe conference call, all participants must hang up the handset or press the EndCall soft key.
To end the conference call:
- Hang up the handset, or press the EndCall soft key.
*Note: Depending on configuration, when the conference call initiator disconnects, the conference call terminates.
Call initiators can use one of the following methods (functionality will vary according to your system configuration):
- To end the conference and remain connected to the most recent call, press the Confrn soft key. The older call is placed on hold.
- To disconnect from the conference hang up the handset. The other parties remain on the conference call.
And that is how you place and end Cisco conference calls on your Cisco phone. Please contact your System Administrator for further information.
For a great selection of new and refurbished business phones from top manufacturers, including Cisco, please visit Startechtel.com or call 800-564-8045. You can also connect with us on Facebook, Google+, Twitter, LinkedIn, and Pinterest.
Posted in Business Communications, Cisco, IP/VoIP Phones, Unified Communications | Comments Off on Cisco IP Phone 7942G: Conference Calls
How To Place Calls On The Polycom VVX 400/410 Phones
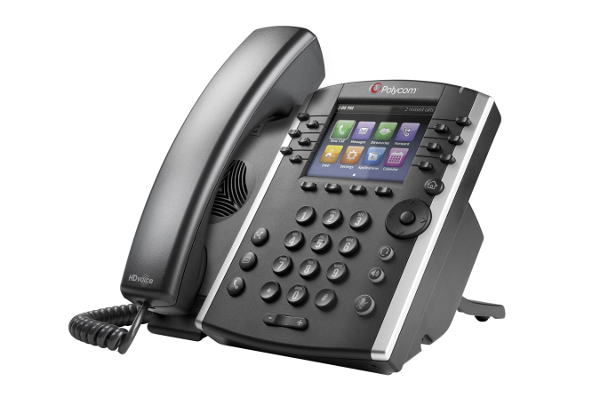 The Polycom VVX 400 and 410 phones provide cost-effective UC solutions that handle moderate call volumes. These business phones offer advanced telephony features which help improve efficiency and productivity among employees. With a bevy of excellent features and benefits, the Polycom VVX 400 and 410 phones make an excellent addition to your business office. Follow these steps to learn how to place calls on your Polycom VVX phone.
You can place a call using the handset, speakerphone, headset, or be pressing the line key of the number you want to call. You may start by dialing the number, and then choose a method to use by picking up the handset, pressing the SPEAKER button, pressing the HEADSET button, or pressing the line key of the person you want to call. Or you may choose a method to use first, and then dial the number.
You can also place calls manually from the Dialer, or automatically by tapping a favorite in Lines view or from your Favorites list, Recent Calls list, or Contact Directory.
Calling From The Dialer
The Dialer displays a list of previously-placed calls. Either select an entry to automatically enter it or start entering a number. As you enter numbers, the Dialer displays a list of similar numbers. Use the UP and DOWN arrow keys to select a match and automatically enter it.
To display the Dialer, do one of the following:
- From Home View, select New Call.
- From Lines or Calls view, press New Call.
- Note: The New Call soft key doesn’t display if you have an active call
- If your phone is idle, start entering a phone number
- Pickup the handset, or press the SPEAKER button or HEADSET button. Note: This method only works if you don’t have an active call.
- In Lines view, press a line key that doesn’t have any calls.
When you access the Dialer, an active call is held.
To call from the Dialer:
- Enter the number, and then pick up the handset, press a line key, press the SPEAKER button, or press the HEADSET button.
- If you’re already in handset, speakerphone, or headset mode, enter the number, and press Dial.
Note: Your System Administrator sets up your phone to automatically place the call after you enter a certain number of digits. If your phone doesn’t automatically place the call, press Send. If a call is placed before you enter all the digits, enter the phone number and press Send.
Placing Calls From Favorites, Recent Calls, And Directories
In addition to the Dialer, you can place calls from the Recent Calls lists, Favorites list, or from your Directory. You can also call a favorite from the Lines view.
To call from the Recent Calls list, choose from one of the following options:
- From Home view, select Directories and select Recent Calls.
- From Lines view, press the right arrow key for the Placed Calls list, the down arrow key for the Missed Calls list, or the left arrow key for the Received Calls list.
From the recent calls list, select the person you want to call and press Dial.
To call from your Favorites list, choose from one of the following options:
- From Home view, select Directories > Favorites
- From Line view, press the up arrow key to access the Favorites list
From your Favorites list, select the favorite you want to call and press Dial.
To call from your Directory:
- From Home view, select Directories and then select Contact Directory.
- From your Directory, select the contact you want to call.
- Place the call by doing one of the following:
- From the contact’s information screen, press Info, select the contact, and press Dial.
- Select the contact and press Dial.
Redialing Numbers
To dial the last numbers you called, press the right arrow key for the Placed Calls list. The first number in the list is the last call you placed.
To redial a number:
- From the Placed Calls list, press Dial.
- Use the up and down arrow keys to select the other previously placed calls.
And that is how you place calls on your Polycom VVX phone. Please see your System Administrator for further questions.
Find a great selection of business phones and telephone equipment from top manufacturers, including Polycom, online at Startechtel.com. To speak with us directly, please call 800-564-8045. You can also connect with us on Facebook, Google+, Twitter, LinkedIn, and Pinterest.
Posted in Business Phone Systems, Programming Your Phone System | Comments Off on How To Place Calls On The Polycom VVX 400/410 Phones
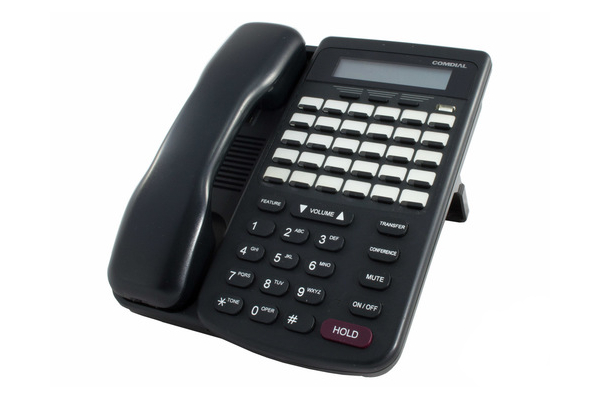
Transferring Calls On The Comdial Impact 8024S Phone
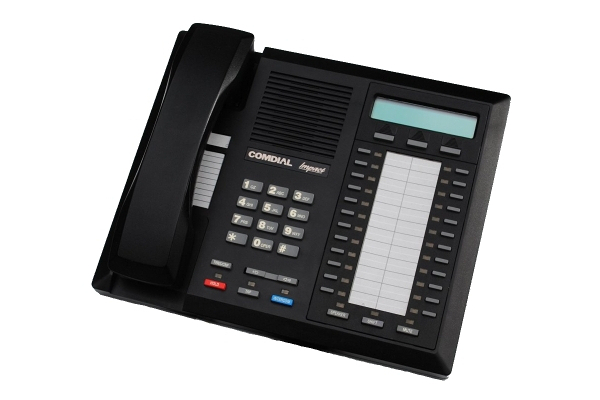 Businesses rely on quality telephone systems to stay connected. Aside from allowing employees to stay connected, phone systems are often the primary way in which customers contact businesses.
If you use the Comdial Impact 8024S phone within your business office, you have access to excellent calling features, such as transferring calls. Being able to easily transfer calls can improve customer service and decrease wait times. To learn how to transfer calls on your Comdial Impact phone, follow these steps.
Transferring Calls – Screened
Screened transfers involve you first identifying the caller to the party receiving the transfer before completing the transfer. This gives the party receiving the transfer the opportunity to prepare for the call.
If the telephone to which you are transferring the call is busy, you must recover the call yourself or choose one of several options that may be available at your station.
If a transferred call is not answered after a certain length of time (as set by the installer), it recalls to your telephone. Again, you have several options for servicing the returning call.
To screen and transfer a call to another telephone in the system:
- Answer call.
- Press TRANSFER/CONFERENCE (call is automatically placed on hold).
- Dial extension number of telephone to receive transfer or press DSS button for that extension.
- When intercom party answers, announce call.
- Press SPEAKER to disconnect (if in speakerphone mode), or hang up.
- The intercom party then has the call (if he or she answered the screened transfer with the handset). If you announce the transfer over the speaker, the intercom party’s telephone will ring with the transferred call after you hang up.
If the intercom party is busy, take one of the following steps (if made available at your telephone by installer programming):
- Press RECON to reconnect the call to your station.
- Press SOHVA to interrupt the call and tell the intercom party that a call awaits.
- Press MSG to leave a message-waiting indication at the called station.
If the intercom party does not answer their telephone when ringing, take one of the following steps:
- Press RECON to reconnect the call to your station.
- Press MSG to leave a message-waiting indication at the station.
Transferring Calls – Unscreened
If you transfer a call without first announcing it, you are making an unscreened transfer.
To transfer an unscreened call to another system telephone:
- Answer call.
- Press TRANSFER/CONFERENCE (call is automatically placed on hold).
- Dial extension number of telephone to receive transfer or press DSS button for that extension.
- Press SPEAKER to disconnect (if in speakerphone mode), or hang up. The transfer will ring at the called telephone.NOTE: Unscreened transfers ring at busy telephones and wait to be answered.
If an unscreened transfer call is not answered and recalls your telephone, you can take one of the following steps:
- Press HOLD to place the call on hold at your telephone.
- Press ANS to return to the call.
- Press SEND to retry the transfer.
Hot Transfer
A hot transfer is a type of screened transfer that is useful for transferring calls to people who need to work in a handsfree mode. A hot transfer involves you voice announcing the transfer over the speaker of the telephone that you want to receive the transfer. The system then releases the call to that telephone in a way that does not require the called party to retrieve that call (the call does not ring at the station).
Once you announce the call and the system completes the transfer, the person receiving the transfer can simply begin speaking toward his or her speakerphone to answer the call.
If you make a hot transfer to a monitor telephone, you can voice announce the call over the telephone’s speaker, but the person receiving the outside line transfer will need to lift the handset to answer the call (the telephone will not ring after the announcement is made).
Note: You cannot make a hot transfer to a telephone if its user has enabled the Voice Announce Block feature. This telephone will automatically ring with the transfer requiring the intercom party to answer it as either a screen or an unscreened transfer.
To make a hot transfer to another telephone in the system:
- Answer call.
- Press TRANSFER/CONFERENCE (the call is automatically placed on hold).
- Dial extension number of telephone to receive the transfer or press the DSS button for that extension.
- Announce call.
- Press TRANSFER/CONFERENCE.
- Press SPEAKER to disconnect (if in speakerphone mode) or hang up. The person receiving the transfer then has the call.
Quick Transfer
The quick transfer method (when programmed by the installer) allows you to do an automatic screened or unscreened transfer of an incoming line call without pressing the TRANSFER/CONFERENCE button. The transfer occurs automatically whenever you answer a call and then dial the intercom number for the transfer location.
To do a quick screened transfer:
- Answer call.
- Dial intercom number for transfer location.
- When party at transfer location answers, announce call.
- Hang up, press RELEASE, or press SPEAKER button.
To do a quick unscreened transfer:
- Answer call.
- Dial intercom number for transfer location.
- Hang up, press RELEASE, or press SPEAKER button.
And that is how you transfer calls on the Comdial Impact 8024S phone. Please see your System Administrator or Installer for further questions.
Find Comdial Impact phones and more telephone equipment from top manufacturers at Startechtel.com. Feel free to call 800-564-8045 to discuss your phone system options with a representative. For the latest news and updates, connect with us on Facebook, Google+, Twitter, LinkedIn, and Pinterest.
Posted in Business Communications, Business Phone Systems, Business Tips, Comdial Phones, Phone Systems | Comments Off on Transferring Calls On The Comdial Impact 8024S Phone
How To Change The Date & Time On The Vodavi Starplus STS Phone
 By now, we all have had time to adjust to the commencement of Daylight Saving Time, but have your desk phones? If you have the Vodavi Starplus STS phone and need to change the date or time, follow these steps.
In order to change the date and time on the Vodavi Starplus STS, you will need to access the System Administrator Mailbox.
1. Begin by pressing the Voice Mail button or dial 440.
2. When the system answers, dial [*#] followed by the System Administrator Mailbox number:
[#] + [0] = two-digit mailbox system
[#] + [00] = three-digit mailbox system
[#] + [000] = four-digit mailbox system
The system will announce: “Mailbox 15-00“, which is the System Administrator Mailbox number. Note: This number does not conflict with Mailbox 15 in a two-digit mailbox system.
3. When requested, enter the System Administrator password (Default: [9] + [#] + [56]).
4. The System Administrator Mailbox menu will prompt you to select an option. Press [4] to Set Date and Time.
5. After the prompt, press:
[1] to review data – The current date and time settings in the Voice Mail are announced, and then you are returned to the Administrator Options Menu.
OR
[2] to change data – After the first prompt, enter the time in four-digit military time format (ex. enter 0930 for 9:30am or 1830 for 6:30pm). After the second prompt, enter the date as a six-digit number in MMDDYY format. You are then returned to the prompt that asks if you want to review data, change data, or exit.
OR
[*] to exit – You are returned to the Administrator Options Menu.
6. When you finish setting Date and Time activities, you have three choices:
Press [1] through [9] to select another System Administrator’s task to perform.
Press [*] to return to the system Main CCR Menu.
Press [*] + [*] to exit the system completely.
And that is how you change the date and time on your Vodavi Starplus STS phone. Please see your System Administrator for further questions.
Visit Startechtel.com to browse our stock of new and refurbished Vodavi Starplus STS phones and equipment, or call 800-564-8045 to speak with a representative. Connect with us on Facebook, Google+, Twitter, LinkedIn, and Pinterest for the latest news and updates.
Posted in Business Communications, Starplus STS Phones | Comments Off on How To Change The Date & Time On The Vodavi Starplus STS Phone
Nortel Networks Phone Manual: Using Voicemail On The Nortel T7208 Phone
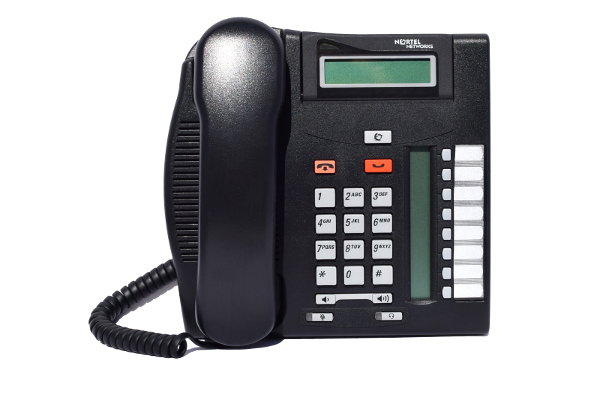 The Nortel T7208 phone is ideal for the office environment, providing smart design and helpful features such as voicemail. If you happen to miss an important call because you are away from your desk or on another call, voicemail enables you to receive voice messages. That way, callers may relay urgent information to you in the message or remind you to return their calls. Calls are automatically sent to voicemail when your telephone is in Do Not Disturb mode and your message lamp will light up when you have new messages.
If you are operating the Nortel T7208 phone in IP Office Standard Version mode, follow the steps below to learn how to use your Nortel Networks phone voicemail.
Unsure of which telephone system you use? Press Feature 9*80. If your system is an IP Office Standard Version system, you will hear an error tone and the display will read “Invalid“. If otherwise, the display will show the software level of the non-IP Office Standard Version mode system. Contact your System Administrator for more information.
Default Short Codes
Short codes are numbers that you can dial from any types of phone on the telephone system. The following are default short codes that may be available on your system (please see your System Administrator for more information).
- Check Messages: *17
Access mailboxes to check messages.
- Voicemail On: *18
Allow voicemail to be used to answer calls.
- Voicemail Off: *19
Stop voicemail being used to answer calls.
- Voicemail Ringback On: *48
Have voicemail ring your phone when you have any new messages. It will call when you use the phone.
- Voicemail Ringback Off: *49
Switch off Ringback.
Message Waiting Indication
As mentioned, the message lamp is lit when you have new messages in your voicemail mailbox. It will remain lit until you have played each of the new messages. Your System Administrator can also configure it so that you receive New Message Waiting Indication for a group or groups.
The icon of a programmable button programmed to Feature 65 will act as a Message Waiting Indicator for new messages. That button can then also be used to access the mailbox.
Checking Messages
- Press Feature 65 or Feature 981. Depending on how your voicemail system is configured, you may be asked to enter your voicemail code.
- Follow the voice prompts provided by the system. For help, press either 8 or *4.
- Automatic Message Deletion
By default, messages are automatically deleted a set time after being played. The delay depends on the particular voicemail server (24 hours for embedded voicemail, 30 days for Voicemail Pro). For voicemail messages on a Voicemail Pro system, the System Administrator can customize the delay and can also apply automatic deletion times to new and saved messages.
Sending Calls To Voicemail
You can redirect a call to voicemail without answering the call. This only applies for calls to you, not calls to a group of which you are a member.
- If you phone is idle, press the Release button. The call is redirected to voicemail.
And that is how you use the voicemail on your Nortel T7208 phone. If you have any questions, please see your System Administrator.
To purchase the Nortel T7208 phone or shop our selection of new and refurbished business phones from top manufacturers, please visit us online at Startechtel.com or call 800-564-8045. You can also connect with us on Facebook, Google+, Twitter, LinkedIn, and Pinterest.
Posted in Business Communications, Nortel Networks | Comments Off on Nortel Networks Phone Manual: Using Voicemail On The Nortel T7208 Phone
Managing Calls On ShoreTel 230 IP Phone
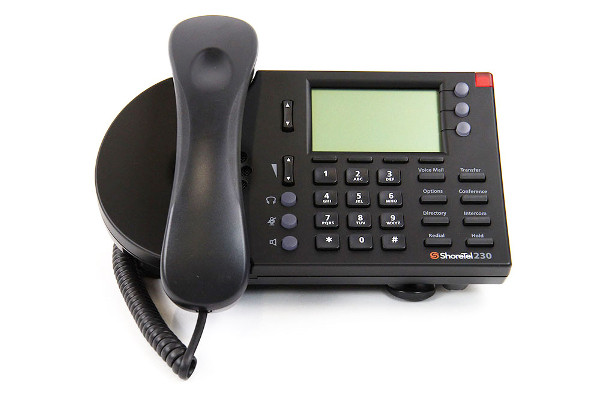 The ShoreTel 230 IP phone is a great addition to any office. Its smart design offers three line appearances, eight function keys, four soft keys, plus a headset jack. If your office relies heavily on voice communications, you may want to consider adding the ShoreTel 230 IP phone to your business phone system.
Follow along as we guide you through the steps of managing calls on the ShoreTel IP230 phone.
Placing Calls
- Using The Handset
To place an internal call, pick up the handset and dial the extension.
To place an external call, dial the trunk access code, then the phone number.
To end a call, hang up the handset.
- Using The Speakerphone
To place an internal call, press the Speakerphone button and dial the extension.
To place an external call, press the Speakerphone button and then dial the trunk access code followed by the phone number.
To end a call, press the Speakerphone button again.
- Using The Headset
To place an internal call, press the Headset button and dial the extension.
To place an external call, press the Headset button and then dial the trunk access code followed by the phone number.
To end a call, press the Headset button again.
Please note that when an outbound call is placed, the soft key functions are different than when the phone is idle – they now allow you to Park the call or Hang Up.
Answering Calls
Ringtones, the blinking Incoming Call Icon, and the flashing red LED light in the top right-most corner of your phone all identify an incoming call on your phone.
A double ring signals an internal call, while a single ring signals an external call. The call key also blinks green.
If the information is available, the caller’s name and number along with the Incoming Call Icon will appear on your display (the caller’s name may be abbreviated to fit on one line).
- Using The Handset
To answer a call, pick up the handset when the phone rings.
To end a call, hang up the handset.
- Using The Speakerphone
To answer the call, press the Speakerphone button. The LED in the button lights green.
To end a call, press the Speakerphone button again.
- Using The Headset
To answer a call, press the Headset button. The LED in the button lights green.
To end a call, press the Headset button again.
- Sending A Call To Voice Mail
When an incoming call arrives, a To VM soft key becomes available. Press the To VM soft key to send the caller directly to your voice mailbox.
- Diverting A Call
You can send an incoming call to another extension or to an outside number without answering it.
- Press Transfer.
- Enter the number or press the extension’s custom key.
- Press the Transf soft key to complete the transfer to an extension.
Answering Additional Calls
With the appropriate permissions, you can receive up to 16 incoming calls at once (the maximum number is set by your System Administrator).
If you receive an incoming call while you are on the phone, you can press the blinking call appearance button to answer the incoming call, and the current call will automatically be put on hold.
Alternately, if the phone is out of call appearance buttons, you can interact with multiple calls by repeatedly press the Hold button.
If you receive an incoming call while you are on another call, you will hear a beep on the call. To answer the incoming call and put the current call on hold, press the Hold button. To return to the previous call, press the call appearance key or press the Hold button again to toggle through the calls.
Transferring a Call
To transfer a call from your extension to another number:
- Press the Transfer button. The call is then put on hold.
- At the prompt, dial the number (or press the extension’s custom key, or use the Directory to find the party), then do one of the following:
a. Complete a blind transfer by hanging up or by pressing the Transf soft key.
b. Speak to the recipient before transferring by pressing the Conslt soft key. After consultation, press the Yes soft key to complete the transfer, or press the Cancel soft key to abandon the transfer and return to the original call.
c. Consult by intercom by pressing the More soft key, and then pressing the Intcom soft key.
d. Send the call to the recipient’s voice mailbox by pressing the More soft key, and then pressing To MB.
And that is how you manage calls on your ShoreTel IP230 phone. If you have any questions, please see your System Administrator.
To purchase the ShoreTel 230 IP phone or any of our other new and refurbished business phones and phone systems, please visit Startechtel.com or call 800-564-8045. For the latest news and updates, connect with us on Facebook, Google+, Twitter, LinkedIn, and Pinterest.
Posted in Business Communications, Business Phone Systems, IP/VoIP Phones, VoIP Phone Systems | Comments Off on Managing Calls On ShoreTel 230 IP Phone
How To Use The Conference Feature On The Avaya 9608 Phone
 When it is not feasible to meet clients or other employees in person, or if you quickly need to touch base with others on a project, a conference call can be very convenient. Conference calls enable three or more parties in different locations to converse on a single call.
The Avaya 9608 IP phone offers a conference feature that is easy-to-use and helps to improve employee efficiency. Follow these steps to learn how to use the conference feature on your Avaya phone.
Set Up A Conference Call
- From the Phone screen, select your active call.
- Press Conf.
- Dial the telephone number, or call the person from the contacts list or the History list.
- Press Join when the person answers the call.
- To add another person, press Add and repeat Steps 3 to 4.
Note: If you have initiated the conference call and drop out, the conference is terminated.
Add A Party On Hold To The Conference Call
- From the phone screen, select your active call.
- Press Conf, or press Add if you are already in a conference.
- Select the call on hold that you want to add to the conference.
- Press Resume to take the call off hold.
- Press Join to add the person to the conference call.
Dropping A Person From A Conference Call
- From the Phone screen, select your active call.
- Press Details.
- Select the person you want to drop.
- Press Drop.
And that is how you use the conference feature on the Avaya 9608 IP phone. For more information on this feature, please contact your System Administrator.
Find the Avaya 9608 IP phone and other new and refurbished business phones at Startechtel.com today! Order online or call 800-564-8045 to speak with a representative.
For the latest news and updates, connect with us on Facebook, Google+, Twitter, LinkedIn, and Pinterest.
Posted in Avaya, Business Communications, IP/VoIP Phones | Comments Off on How To Use The Conference Feature On The Avaya 9608 Phone
How To Program Feature Keys On The Mitel 5330E/5340E IP Phones
 Some business phones provide programmable feature keys, which allow you to access certain features by the touch of a button. The Mitel 5330E phone offers 24 programmable feature keys, while the Mitel 5340E phone offers 48 programmable feature keys. Both models allow you to assign Features and Fixed Functions Keys or Applications (People, Settings, Call Forwarding, Conference Unit) to these keys. To program your programmable keys, you may use the Settings application or the Unified Communicator Express application.
If you have a Mitel 5330E/5340E phone, follow these steps to learn how to program the feature keys via the Settings application.
Please note: Only the System Administrator can program line select and line appearance keys. The user’s Prime line by default is Key 1.
To program a Phone Feature or hard key:
1. Press the blue Menu key, and then press Settings.
2. Press Programmable Keys and then press the key you wish to program.
3. If applications are displayed, press View Features.
4. Use the Page Navigation keys to move through the features list.
5. Select the desired feature or fixed function key from the list. A default label is automatically assigned to the key.
6. Enter the required information in the fields provided, if necessary.
7. If you are programming any featured other than Speed Call, Message Waiting Indicator, Call Park and Call Park Retrieve, press Save and you are finished.
If you are programming Message Waiting Indicator and/or Call Park, perform the following:
- Press the Edit Number field.
- Using the dial pad, enter the appropriate numbers that correspond to the phone whose messages you wish to be notified of (Message Waiting) or the directory number (Call Park).
- Press Save.
8. Press Close.
To program a Phone Application:
1. Press the blue Menu key and then press Settings.
2. Press Programmable Keys and then press the key you wish to program.
3. If Features are displayed, press View Applications.
4. Select the desired application.
5. Press Save.
6. Press Close.
To program Speed Call:
1. Press the blue Menu key and then press Settings.
2. Press Programmable Keys and then press the key you wish to program. If it’s already programmed, press Clear Key.
3. Press Speed Call.
4. Press Edit Info and enter the label for the Speed Call.
5. Press Save.
6. Press Edit Number and enter the phone number for the Speed Call:
- The maximum length is 26 characters
- 0-9, # and *. Pause and Flash are not allowed.
- You can use the dial pad to enter the number.
7. Press Save, and then press Save again.
8. Press Close, and then press Close again.
Please note: To return to the Feature or Applications list at any time, press Cancel or View Applications. You may also choose to Edit The Label, Clear Information, and Clear Key.
You may clear the programming form a key if you are no longer using it.
To clear the feature or application programming from a key:
1. Press the blue Menu key and then press Settings.
2. Press Programmable Keys and then press the key you wish to clear.
3. Press Clear Key.
4. Press Close.
And that is how you program the programmable feature keys on the Mitel 5330E/5340E phone. You may also follow these steps to program the 12-button or 48-button Programmable Key Module (PMK).
We carry new and refurbished business phones and phone systems from top manufacturers including Mitel. Browse our stock online at Startechtel.com or call 800-564-8045 to learn more about our products and services. Connect with us on Facebook, Google+, Twitter, LinkedIn, and Pinterest.
Posted in Business Communications, IP/VoIP Phones, Mitel Phones | Comments Off on How To Program Feature Keys On The Mitel 5330E/5340E IP Phones
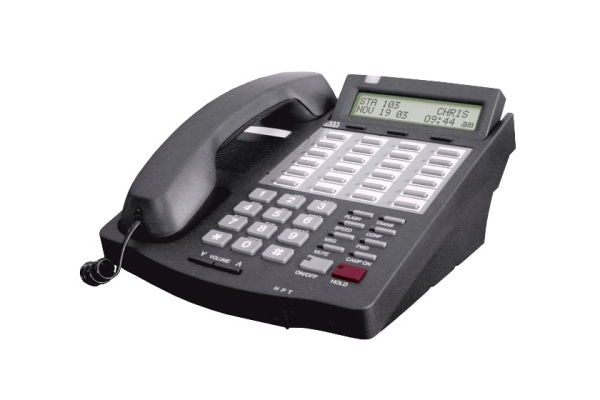
How To Change The Time & Date On Comdial DX-80 & DX-120 Phones
 We are just a month away from Daylight Saving Time, where we “spring forward” and lose an hour (thus making evening daylight last longer). For most businesses, if their phone systems do not automatically update, the times on their desk phones will be incorrect. If you have a Comdial DX-80 or Comdial DX-120 phone system and don’t recall how to change the time or date, follow these steps:
From any telephone, press Feature # * and enter in your password. Default password ######## (press the pound {#} key 8 times).
Press Show and enter 08 14.
Press Save then Show.
The option to change the Year will appear.
- If you do not need to change the year, press Next.
- If you need to change this value, press Chg, enter in two digits for the year and press Save then Next.
The option to change the Month will appear.
- If you do not need to change the month, press Next.
- If you need to change this value, press Chg, enter in two digits for the month and press Save then Next.
The option to change the Day will appear.
- If you do not need to change the date, press Next.
- If you need to change this value, press Chg, enter in two digits for the date and press Save then Next.
The option to change the Weekday will appear.
- If you do not need to change the weekday, press Next.
- If you need to change this value, press Chg, select the weekday, and press Next.
The option to change the Hour will appear. Press Chg and enter in two digits for the hour in military format. Press Save then Next.
The option to change the Minutes will appear. Press Chg and enter in two digits for the minutes, and then press Save.
Press the HOLD button to take the phone out of programming mode.
For more information about your Comdial DX-80 & DX120 phone system, please see your system administrator. For a wide selection of new and refurbished Comdial phones and other business phone systems and equipment, please visit Startechtel.com or call 800-564-8045. Connect with us on Facebook, Google+, Twitter, LinkedIn, and Pinterest!
Posted in Comdial Phones, Programming Your Phone System | Comments Off on How To Change The Time & Date On Comdial DX-80 & DX-120 Phones


