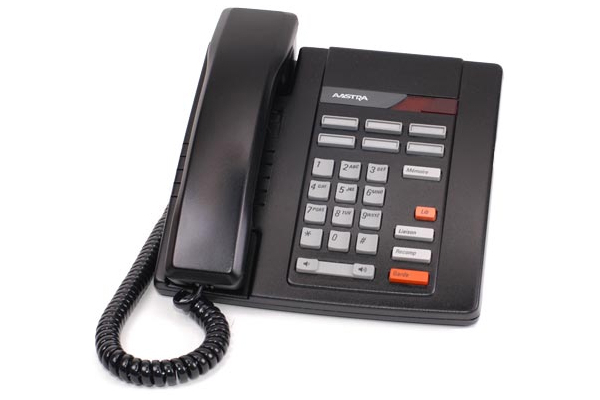
Using Speed Dials On The NEC DSX Phone
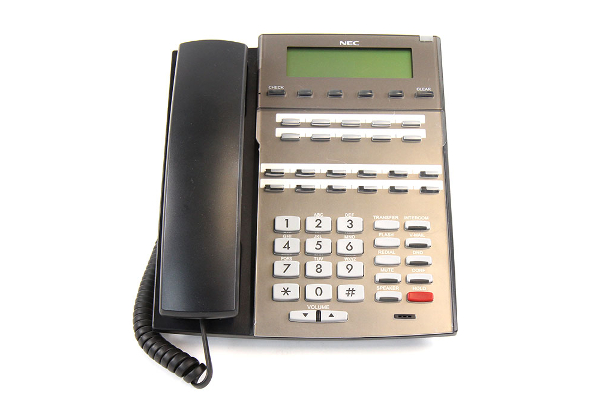 With excellent design, features, and reliability, you should consider adding NEC DSX business phones to your office. Both the NEC DSX 22-Button or 34-Button phones are affordable options that offer convenience functions for users, including Speed Dial.
Speed Dial gives an extension user quick access to frequently called numbers, and with NEC DSX phones, there are two types: System and Personal. Speed Dial numbers can be up to 32 digits long, using 0-9, # and *, and they can have a programmed name up to 18 characters long. The name shows in the telephone display as the Speed Dial number dials out.
Speed Dial can store outside numbers and Intercom digits. The capability to store Intercom digits provides the user with “one-touch” access to features they use most often. For example, a user can have a Speed Dial bin that simplifies forwarding calls to voice mail or a co-worker.
About System Speed Dial
System Speed Dial gives every extension access to the same set of stored numbers. Depending on the system option selected, the system provides either 10, 100, or 1000 System Speed Dial numbers.
About Personal Speed Dial
Personal Speed Dial provides extensions with 20 numbers stored privately for their own use. The Personal Speed Dial keys on a DSS Console access the same bins as the extension to which it is attached.
Unique Speed Dial Entries
In addition to the digits 0-9, # and *, you can enter the following for additional dialing options.
- For system programming:
- Press Feature Key 1 for Flash
- Press Feature Key 2 for Wait
- Press Feature Key 3 for Pause
- For user programming:
- Press FLASH for Flash
- Press N/A for Wait
- Press MUTE for Pause
Storing Line Routing in a Speed Dial Bin
When you program a Speed Dial bin, you can select either a line or a Line Group over which the call should route. For example, you can enter 1 for line 1 or 90 for Line Group 90.
- If you enter a Line Group number, the system will follow the Line Group programming and select an available line in the group for the call.
- If you enter a line number and the line is busy when the Speed Dial bin tries to dial out, the user hears a busy tone. If their extension has Line Queuing, they can dial 2 to queue for a line to become free. If they hang up, the system converts the queue to a Line Callback.
- The capability to dial 90-98 to select a Line Group for a Speed Dial call is a permanent feature and not affect by programming.
Centrex Compatibility
Speed Dial offers unique compatibility with connected Centrex services. A Speed Dial number can accommodate both placing a new call and outdialing the stored Speed Dial number on an active Centrex line. This enables features such as Centrex Transfer and Conference. Speed Dial adheres to the following rules:
1. When a user active on an outside call presses TRANSFER and selects a Speed Dial number (using any method), the system examines the contents of the stored Speed Dial bin.
2. If the first entry in the bin is an F (Flash command), the system flashes the connected line and outdials the contents of the bin (ignoring the line selection associated with the bin).
- Note that this unique Centrex integration also pertains to voice mail ports accessing stored Speed Dial numbers.
Chaining Bins for Dialing Long Numbers
A Speed Dial number can be up to 32 digits long. The system allows this by automatically using the next adjacent bin for entries longer than 16 digits. For example, assume you want to store a Personal Speed Dial number for a banking service (203-926-5400) followed by a pause and your 10 digits customer code (9876543210). If you store the entries in bin 701, the following occurs:
- The system stores the first 16 digits (203 926 5400 Pause 98765) in bin 701.
- The system stores the remaining digits (43210) in bin 702.
Chaining Notes:
- In the above example, bin 702 is inaccessible for viewing, programming, or dialing. It only becomes available if you reprogram bin 701 to be 16 digits or less.
- Since bin 720 is the last Personal Speed Dial bin, it can only contain 16 digits.
Personal Speed Dial
- To program a Personal Speed Dial number:
1. Do not lift the handset or press any keys.
2. Dial #SP (#77).
3. Do one of the following:
a. Dial the Personal Speed Dial bin number (701-720).
b. Press a Personal Speed Dial bin key (for bins 701-710).
4. Press HOLD.
5. Do one of the following:
a. Enter the line number you want the system to use when dialing your stored number (1-64).
b. Enter the Line Group number you want the system to use when dialing your stored number (90-98).
c. Press INTERCOM if you want to enter Intercom codes.
6. Press HOLD.
7. Enter the number you want to store (up to 32 digits long).
- If storing Intercom codes, you can enter a valid dial sequence using the digits 0-9, # and *.
- To insert a pause, press MUTE. To insert a Flash, press FLASH.
- Do not enter a pause or flash into an Intercom code.
8. Press HOLD.
9. Enter a name for the Speed Dial number.
10. Press HOLD.
11. Do one of the following:
a. Repeat from step 3 to program another bin.
b. Press SPEAKER to exit.
- To dial a stored Personal Speed Dial number:
1. Do one of the following:
a. Press INTERCOM, dial #, and then dial the Personal Speed Dial bin number (701-720).
b. Press bin key for bins 701-710.
c. Press a Feature Key set up as a Personal Speed Dial key.
2. Optional:
- To chain bins, wait for the first bin to dial out, and then press a bin key or Feature Key.
- If the programmed route is busy, press an idle line key to reroute the call.
- You cannot chain Intercom numbers.
System Speed Dial
- To program a System Speed Dial number:
1. Do not lift the handset or press any keys.
2. Dial #SP (#77).
3. Dial the System Speed Dial bin number (normally 200-299).
4. Press HOLD.
5. Do one of the following:
a. Enter the line number you want the system to use when dialing your stored number (1-64).
b. Enter the Line Group number you want the system to use when dialing your stored number (90-98).
c. Press INTERCOM.
6. Press HOLD.
7.Enter the number you want to store (up to 32 digits long).
If storing Intercom codes, you can enter a valid dial sequence using the digits 0-9, # and *.
To insert a pause, press MUTE. To insert a Flash, press FLASH.
Do not enter a pause or flash into an Intercom code.
8. Press HOLD.
9. Enter a name for the Speed Dial number.
10. Press HOLD.
11. Do one of the following:
a. Repeat from step 3 to program another bin.
b. Press SPEAKER to exit.
- To dial a stored System Speed Dial number:
1. Do one of the following:
a. Press INTERCOM, dial #, and then dial the System Speed Dial bin number (normally 200-299).
b. Press a Feature Key set up as a System Speed Dial key.
2. Optional:
a. To chain bins, wait for the first bin to dial out, and then press a bin key or Feature Key.
b.If the programmed route is busy, press an idle line key to reroute the call.
And that is how you program and dial both Personal and System Speed Dials. If you have any questions, please contact your System Administrator.
If you are looking for cost-effective, new and refurbished NEC DSX business phones and other telephone system equipment, please visit Startechtel.com or call 800-564-8045. You can also connect with us on Facebook, Google+, Twitter, LinkedIn, and Pinterest.
Posted in Business Communications, NEC Business Phones, Programming Your Phone System | Comments Off on Using Speed Dials On The NEC DSX Phone
Handling Incoming Calls On The Polycom VVX 400/410 Phone
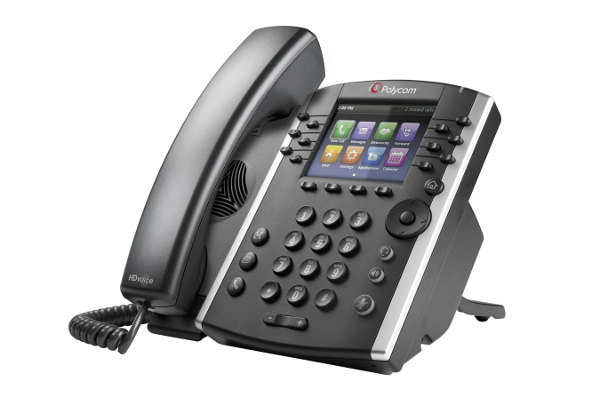 The Polycom VVX 400 and 410 phones are an ideal choice for business offices. With excellent features, such as Polycom HD Voice, these phones enable users to make more efficient and productive calls. With easy-to-use features and exceptional performance, the Polycom 400 and 410 phones are an obvious choice.
When your Polycom phone rings, you may answer it right away or you may:
- Temporarily ignore the call before answering.
- Reject the call so it goes directly to voicemail.
- Forward the call to another person.
Ignoring Incoming Calls
Ignore or silence a call to stop your phone from ringing. Even though the call is ignored, your phone will still display the incoming call notification so you can still answer the call.
To ignore or silence a call:
- From the Incoming Call window, press Ignore (for private lines) or Silence (for shared lines).
The Incoming Call window disappears, your phone stops ringing, and either Home or Calls view displays.
Rejected Incoming Calls
Reject a call to stop your phone from ringing and send the call directly to voice mail. Calls you reject display in your Recent Calls list. Rejecting calls is not available for shared lines.
To reject an incoming call:
- From the Incoming Call window, press Reject. You can also reject an incoming call from Lines and Calls view.
The call goes directly to voice mail.
Forwarding Incoming Calls To Another Person
While your phone rings, you can forward the call to another person.
To forward an incoming call to another person:
- While your phone rings, press Forward.
- From the Call Forwarding screen, enter the forwarding number, and press Forward.
Note: You can also set up your phone to forward all incoming calls to another person, or forward all calls from a certain contact to another person.
For more information regarding your Polycom phone, please see your System Administrator.
Shop our wide selection of new and refurbished business phones and systems featuring top brands like Polycom. Visit Startechtel.com or call 800-564-8045. You may also connect with us on Facebook, Google+, Twitter, LinkedIn, and Pinterest.
Posted in Business Communications, IP/VoIP Phones | Comments Off on Handling Incoming Calls On The Polycom VVX 400/410 Phone
Conference Calls On The Mitel 5330E IP Phone
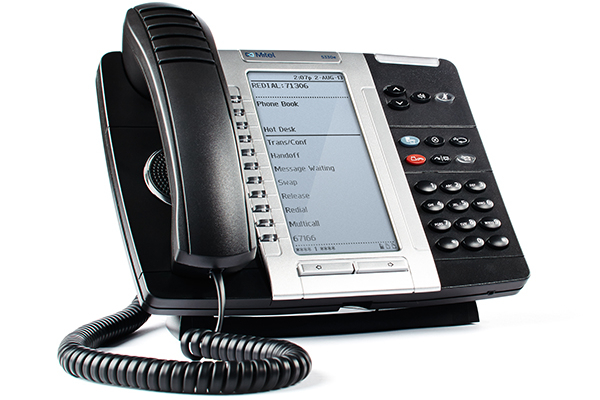 The Mitel 5330E IP phone is excellent for offices with moderate to high call volumes. You will find exceptional features that provide the ultimate convenience for users. Of these beneficial functions is the Conference feature, which allows three or more parties to communicate on one call. Follow these steps to learn how to use the Conference feature on your Mitel 5330E IP phone.
Conference
To form a Conference when a two-party call s already in place, or to add another party to an existing Conference:
- Press TRANS/CONF.
- Dial the number of the next party.
- Wait for an answer.
- Press TRANS/CONF.
To leave a Conference:
- Hang up or press CANCEL.
Conference Split
To Split a Conference and speak privately with the original party:
Press the Split softkey.
Add Held
To move a call on hold to another line appearance:
- Press an available line key.
- Press the AddHeld softkey.
- Press the flashing line key.
To add a call on Hold to an existing conversation or conference:
- Press the AddHeld softkey.
- Press the flashing line key.
Swap
To call another party when you are in an established two-party call:
- Press TRANS/CONF.
- Dial the number.
To alternate between the two parties:
Press the Trade Calls softkey.
And that is how you use the Conference feature on your Mitel phone. Please see your System Administrator if you have any questions.
For cost-effective pricing on the Mitel 5330E IP phone and other new and refurbished business phones and equipment, please visit Startechtel.com or call 800-564-8045. You can also connect with us on Facebook, Google+, Twitter, LinkedIn, and Pinterest for the latest updates.
Posted in Business Communications, Conference Phones, IP/VoIP Phones, Mitel Phones | Comments Off on Conference Calls On The Mitel 5330E IP Phone
Using Call Transfer On The Grandstream GXP2130 IP Phone
Of the features that help users efficiently manage calls is Call Transfer. To learn how to use this feature on your Grandstream phone, follow these steps.
Blind Transfer:
1. Press the Transfer button (two phone icons with an arrow in between).
2. Dial the number and press the Send button (green handset icon) to complete transfer of active call.
Attended Transfer:
1. Press an idle line key to make a new call and the active LINE will be placed on hold automatically.
2. Once the call is established, press the Transfer button, followed by the LINE button of the held line to transfer the call.
3. After the call is transferred, phone will display idle screen.
Auto-Attended Transfer:
1. Set “Auto-Attended Transfer” to “Yes” on Web GUI.
2. Establish one call first.
3. Press the Transfer key to bring up a new line, and the first call will be placed on hold automatically.
4. Dial the number and press the Send button to make a second call.
5. Press the Transfer key again to make the transfer.
Note: For Auto-Attended Transfer, after dialing out the number for the second call, a “Split” soft key will show. If the second call is not yet established (ringing), pressing “Split” will hang up the second call. If the second call is established (answered), pressing “Split” will resume the second call and keep the first call on hold.
And that is how you use the Call Transfer feature on the Grandstream GXP2130 phone. Please see your System Administrator if you have any questions.
To find an affordable selection of new and refurbished Grandstream phones and more business phones from top manufacturers, please visit us online at Startechtel.com or call 800-564-8045. To stay up to date on the latest news and deals, connect with us on Facebook, Google+, Twitter, LinkedIn, and Pinterest.
Posted in Business Communications, Grandstream Business Phones, IP/VoIP Phones | Comments Off on Using Call Transfer On The Grandstream GXP2130 IP Phone
Call Forwarding On The Intertel Axxess 550.8560 Phone
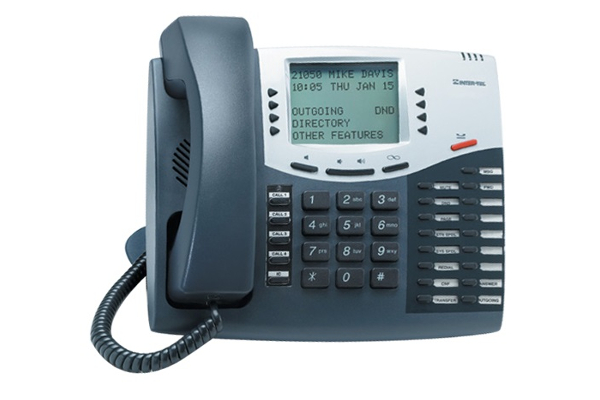 The Call Forwarding feature on most business phones allows you to redirect incoming calls to other phones or extensions. This allows employees more flexibility if they are out in the field or working remotely. This also benefits customers as their calls can be attended to if someone is unavailable.
The Intertel Axxess 550.8560 phone provides the Call Forwarding feature, along with other excellent calling features and a smart and durable design suited for business offices small and large. Follow along as we break down the steps to use Call Forwarding on the Intertel 8560 phone.
With the Forwarding feature, you can have calls follow you (e.g., forwarded to a cell phone), or you can redirect calls to a voice mail or other extension.
Manual Call Forwarding
Manual call forwarding allows you to send incoming calls to another extension number. You can even forward calls to outside numbers, if your phone is programmed to allow this.
To forward calls:
1. Either press FWD OR enter one of the following feature codes:
- 355 (Call Forward All Calls): All incoming calls are forwarded without ringing at your phone.
- 356 (Call Forward If No Answer): All incoming calls are forwarded if they are not answered before a timer expires.
Note: Only the installer or System Administrator can adjust this timer. - 357 (Call Forward If Busy): When your phone is busy, all incoming calls are forwarded without ringing at your phone.
- 358 (Call Forward If No Answer or Busy): All incoming calls are forwarded if your phone is busy or if you do not answer, as described above.
2. Do one of the following:
- To forward to an outside telephone number: Select an outgoing line and dial a telephone number.
- To forward to an extension number: Dial the extension number.
- To forward to your message center: Press MSG.
To cancel any call forward request:
- Press FWD and then press SPEAKER.
Redirect Call
Note: This feature is available only with versions 5.3 and later Axxess software.
The Redirect Call feature allows you to forward any call that is ringing on your phone without having to answer the call.
Note: You cannot redirect calls to an extension that is in DND or to a restricted outside number.
To redirect a call to an extension number:
- Press the Special Key (∞) and dial 331.
- Dial the extension number.
To redirect a call to an outside telephone number:
- Press the Special Key (∞) and dial 331.
- Enter the outside number.
Automatic System Forwarding
Automatic System Forwarding allows your System Administrator to route calls based on the type of call and the status of your telephone. Although you cannot program the path of a system forward, you can enable or disable this feature on your phone.
To enable or disable System Forwarding:
- Dial 354.
And that is how you use the Forwarding feature on the Intertel Axxess 550.8560 phone. Please see your System Administrator for more information.
For affordable prices on a variety of new and refurbished telephones and phone equipment from top manufacturers including Intertel, shop with us online at Startechtel.com or call 800-564-8045 today! You may also find us on Facebook, Google+, Twitter, LinkedIn and Pinterest.
Posted in Business Communications, Intertel Phones | Comments Off on Call Forwarding On The Intertel Axxess 550.8560 Phone
Aastra M8009 Phone: Memory Keys
 The Aastra M8009 phone provides six memory keys to save frequently called numbers (such as phone numbers for customers or business associates) or feature codes for telephone services.
To save a telephone number or feature code in memory:
- Lift the receiver and wait for a dial tone (the tone will continue while you save).
- Press SAVE.
- Press a memory key.
- Use the dial pad to enter the telephone number or feature code.
- Press SAVE.
Saving a pause in memory:
PBX or Centrex users may want to program a pause – to receive a second dial tone – into a saved number. When you save the number, press HOLD where the pause should occur. For example: 9 [HOLD] 800-555-1234.
Erasing A Number
You can clear the number from a memory key in two ways: you can erase the number, or you can save a new number over the old one.
To erase a memory key:
- Lift the receiver and wait for a dial tone (the dial tone will continue while you erase).
- Press SAVE.
- Press the memory key that you wish to erase.
- Press SAVE.
- Hang up the receiver.
And that is how you program the memory keys on your Aastra M8009 phone. If you have any questions, please see your System Administrator.
For a vast selection of new and refurbished business phones and telephone equipment from leading manufacturers such as Aastra, please visit Startechtel.com or call 800-564-8045. You may also connect with us on Facebook, Google+, Twitter, LinkedIn, and Pinterest.
Posted in Aastra phones, Business Communications | Comments Off on Aastra M8009 Phone: Memory Keys
Programming Custom Buttons On The ShoreTel 230 IP Phone
 Ideal for the office environment, the ShoreTel 230 IP phone offers excellent features and functions. Some of these features and functions include an intuitive visual interface, quick dialer directory, and custom keys.
You can program the custom keys on your IP 230 phone as shortcuts to operations that would normally require pressing two or three buttons to accomplish the same task.
Note: Contact your System Administrator to verify that you have permissions to configure the programmable buttons on your phone before proceeding.
To program the custom buttons on your IP 230 phone, follow the procedure below:
1. Press the Options button, followed by your password and then press #.
2. Scroll through the list to option 4. Program Buttons, or press 4 on the keypad.
3. Press the Edit soft key.
4. Press the custom button that you would like to program.
5. Scroll through the list of functions until you find the function that you would like to apply to this button.
Note: Your choices are limited to just Call Appearance and Dial Number (i.e. Speed Dial) when programming the buttons via the 230 interface. To program one of the other functions to your custom buttons, please contact your System Administrator, as all other functions must be programmed via ShoreWare Director.
6. When you have highlighted the desired function, press the Next soft key.
7. Enter an extension or external number. Then, press the Next soft key.
8. Press the [1->Aa] soft key to shift the key pad between numeric and alphabet mode, and enter a descriptive label no longer than five characters that will remind you of the new function of the custom button.
Note: When in alphabet mode, press the appropriate key on the dial pad multiple times to scroll through the alphabet letters associated with that key. Example: For the letter “C” you would press 2 three times on the dial pad.
9. Press the Done soft key.
10. Press the Done soft key again to store your changes.
And that is how you program the custom buttons on your ShoreTel phone. For more information, please see your System Administrator.
To purchase the ShoreTel 230 IP phone or any of our other new and refurbished business phones and phone systems, please visit Startechtel.com or call 800-564-8045. For the latest news and updates, connect with us on Facebook, Google+, Twitter, LinkedIn, and Pinterest.
Posted in Business Communications, Business Phone Systems, IP/VoIP Phones, Phone Systems | Comments Off on Programming Custom Buttons On The ShoreTel 230 IP Phone
Cisco IP Phone 7942G: How To Transfer Calls
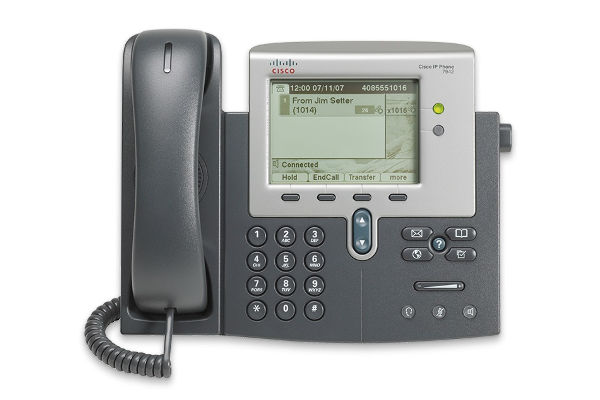 The ability to transfer calls to others, whether in office or on the field, makes office life much more convenient. Employees need not miss any calls and customers receive the proper customer service they deserve. With the Cisco 7924G IP phone, transferring calls is an easy task to master. Follow along as we break down the steps.
Transfer A Call
To transfer a selected call to another number, you can use blind transfer or consultative transfer:
Blind Transfer
A blind transfer immediately redirects the call without allowing you to speak to the transfer recipient (the person to whom you are transferring the call).
To make a blind transfer call:
1. During a call, press the Trnsfer soft key. The call is placed on hold.
2. Dial the number to which you want to transfer the call.
Consultative Transfer
A consultative transfer redirects the call after first allowing you to speak to the transfer recipient.
To make a consultative transfer:
1. During the call, press the Trnsfer soft key. The call is placed on hold.
2. Dial the number to which you want to transfer the call.
3. Wait for the call to be answered. Speak to the transfer recipient. Then press the Trnsfer button or hang up the handset.
4. If the transfer fails, press the Resume soft key to return to the original call.
Transfer To Voice Mail
1. Press TrnsfVM.
2. Enter the recipient’s extension number and press TrnsfVM again.
Cancel Transfer
- To cancel your consultative call-transfer attempt, press the EndCall soft key.
- To reconnect to the original caller, press the Resume soft key.
And that is how you transfer calls on your Cisco IP Phone 7942G. If you have any questions, please see your System Administrator.
For great prices on new and refurbished Cisco business phones and more, please visit Startechtel.com or call 800-564-8045. You may also connect with us on Facebook, Google+, Twitter, LinkedIn and Pinterest.
Posted in Business Communications, Cisco, IP/VoIP Phones | Comments Off on Cisco IP Phone 7942G: How To Transfer Calls
How To Start A Conference Call On The Avaya Merlin BIS10 Phone
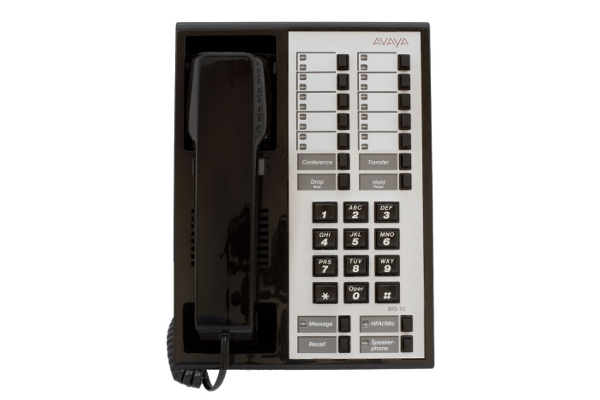 Making conference calls on the Avaya Merlin BIS10 phone allows you to connect with up to three inside participants (including yourself) and up to two outside participants. This makes it easier to collaborate with colleagues, saving travel time and money. To learn how to start a conference call on your Avaya Merlin BIS10 phone, follow these steps:
- Dial the first number or extension.
- After the first call is answered, press Conference (this will put the call on hold).
- Select a line button, if not selected.
- Dial the next number or extension.
- Announce the call and press Conference.
- Repeat steps 2-5 for each outside participant.
- To end the conference, hang up.
- Press Drop and line button to drop any participant added.
- Press Hold to temporarily leave the conference.
- Press any participant’s line to rejoin the conference.
And that is how you use the Conference feature on the Avaya Merlin BIS10 phone. If you have further questions, please see your System Administrator.
For great prices on the Avaya Merlin BIS10 phone and other new and refurbished phones and equipment, visit Startechtel.com or call 800-564-8045 today! You can also connect with us on Facebook, Google+, Twitter, LinkedIn and Pinterest!
Posted in Avaya, Business Communications, Business Tips, Conference Phones | Comments Off on How To Start A Conference Call On The Avaya Merlin BIS10 Phone
Holding Calls On The Comdial Impact 8012S Phone
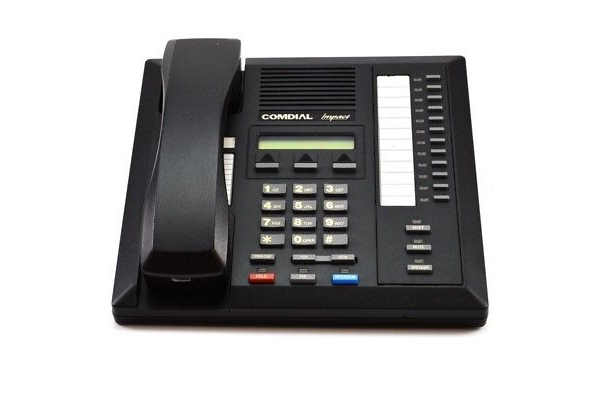 The Comdial Impact 8012S phone boasts exceptional call handling features that help to enable multitasking for users and increase productivity for businesses overall. In addition, Comdial phones are known for delivering excellent performance and reliability, making them an ideal desk phone for various business office settings.
When it comes to call handling, the Comdial Impact 8012S phone offers users different ways to place a call on hold and retrieve it later. To learn how to use the Hold feature, follow these steps.
Hold
With a regular hold, you can pick up the held call at your telephone or another user can pick the call up at a telephone sharing the held call line appearance.
To place a call on hold:
1. Press HOLD (station button) or select Hold (interactive button).
To retrieve a held call:
2. Press the line button of the held call (with winking green light), or INTERCOM for intercom call held or press TAP.
3. Speak toward the telephone or lift the handset if privacy is desired.
Note: Unless you use your HOLD button to scroll through the calls on hold, TAP always retrieves the last number placed on hold, regardless of whether you have line appearance for the line on which the call is holding.
Exclusive Hold
With an exclusive hold condition, you must pick up the held call at your telephone; no other telephone has access to the call.
To place a call on exclusive hold:
1. Press HOLD twice.
To retrieve exclusive hold:
2. Press the line button of the held call (with winking green light), or press TAP.
3. Speak toward the telephone or lift the handset if privacy is desired.
Handling Hold Recalls
After a call has been on hold for the period of time (set by the installer of your system), the system causes four quick hold recall tone bursts to sound at your telephone, the flash rate of the line button becomes faster and the light becomes orange. If the call is on exclusive hold, it will revert to manual hold after the hold recall period.
If a held line is recalling, choose one of the following:
- Select Hold to place the call on hold at your station and restart hold timer.
- Lift the handset, press the line button (with flashing orange light) or select Answer to retrieve the call.
Using Directed Call Hold
The installer can add a directed station hold feature to your telephone. With this feature, you can place a call on hold at another station. You can also pick up the held call that has been waiting the longest length of time at another telephone.
To place a call on directed station hold:
- Answer the call.
- Press INTERCOM or TRNS/CONF if intercom call.
- Dial *90.
- Dial the extension number of the station to receive the held call.
- Hang up.
To retrieve a held call at another station:
- Press INTERCOM.
- Dial #90.
- Dial the extension number of the station where the call is currently on hold.
- Press TAP to answer the call.
Selecting Specific Held Calls
Often, you will have more than one call on hold at your station. You know you can retrieve the last call placed on hold simply by pressing TAP; however, if you do not have line appearance for a line on which another call is holding, the system provides a way for you to access that call before servicing the last call you placed on hold.
To scan your held calls and retrieve a specific one:
- Repeatedly press HOLD to scan held call list.
- Press TAP to retrieve call.
And that is how you hold and retrieve calls on the Comdial Impact 8012S phone. Please see your System Administrator for further questions.
For excellent prices on new and refurbished business phones from top manufacturers including Comdial, please visit Startechtel.com or call 800-564-8045. You may also connect with us on Facebook, Google+, Twitter, LinkedIn, and Pinterest.
Posted in Business Communications, Comdial Phones | Comments Off on Holding Calls On The Comdial Impact 8012S Phone


