How To Transfer Calls On Vodavi Starplus STS Phones
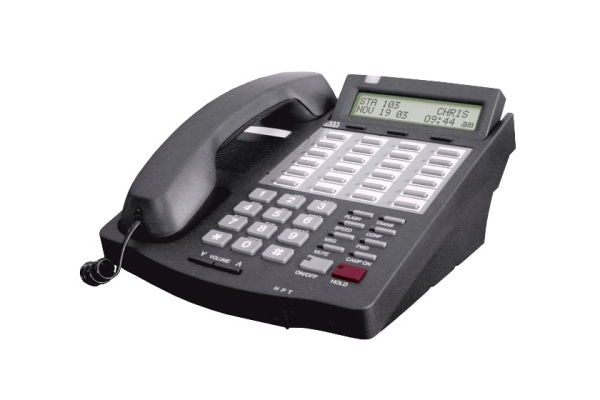 When it comes to busy offices and high call volumes, call transfer can be a lifesaver. Easily direct callers to the appropriate party, improving efficiency and the customer experience overall. However, this depends on the type of desk phones used within the office. The Vodavi Starplus STS phone is easy to use, delivers solid performance, and comes equipped with exceptional features, including Call Transfer.
With Call Transfer on the Vodavi Starplus STS phone, outside lines can be transferred from one phone to another within the system. The transfer can be either screened (announced) or unscreened to either an idle or busy station, a UCD group, or a Hunt Group.
Executive/Secretary Transfer
- If you are designated the Executive station and your phone is busy or in DND, all calls will be routed to the Secretary station.
- If you are the designated Secretary station, you can signal the Executive that is busy or in DND by using the Camp On feature.
PBX/Centrex Transfer
While connected to an outside line (PBX/Centrex):
- Press FLASH. The transfer dial tone will be heard.
- Dial the PBX/Centrex station number.
- Hang up to complete the transfer.
Single Line Telephone
To make a PBX/Centrex Transfer:
- Briefly depress and release the hookswitch. An intercom dial tone will sound.
- Dial 660. A Flash command is presented to the PBX or Centrex CO Line (a stutter tone will sound).
- Dial the desired telephone number.
- Replace the handset to complete transfer.
Screened Transfer
To conduct the transfer, while connected to an outside line:
- Press the station button where call is to be transferred (if programmed on your telephone) or press TRANS and dial station number.
The called extension signals according to the intercom signal switch position. - When that extension answers, announce the transfer.
- Hang up to complete the transfer.
To answer the Screened Transfer:
Your intercom will be signaling according to the intercom signal switch position.
- Answer the intercom and receive the transfer notice.
- Press OUTSIDE LINE or flashing LOOP button on hold.
Note: If the Direct Transfer feature is enabled, the screened transfer will go directly to the handset. You do not have to press a LINE or LOOP button to answer.
Transfer Search
When attempting to locate a party:
- Press a station DSS button to signal the station or press TRANS and dial desired station.
- If the station is unavailable, press another DSS button to enter a new station number or press TRANS twice and dial the station number.
- When the station answers, hang up to complete transfer.
Unanswered CO Call Transfer
While idle or on an internal/external call and an incoming or transferred CO call is ringing at your station:
- If on another call, place the current call on hold and replace the handset or press ON/OFF.
- Dial the INC CO XSFR code [639] or press preprogrammed ICN CO XSFR flexible button.
- Press a DSS, Group button, or dial a station or group number. Call automatically transfers to that destination.
- You can then return to the call placed on hold.
Unscreened Transfer
- Press the TRANS button.
- When the called extension begins to signal, hang up to transfer the call (the Recall Timer starts).
- Replace the handset or press ON/OFF.
And that is how you transfer calls on the Vodavi Starplus STS phone. For more information, please see your System Administrator.
Visit Startechtel.com to browse our stock of new and refurbished Vodavi Starplus STS phones and equipment, or call 800-564-8045 to speak with a representative. Connect with us on Facebook, Google+, Twitter, LinkedIn, and Pinterest.
Posted in Business Communications, Business Phone Systems, Vodavi Phone Systems | Comments Off on How To Transfer Calls On Vodavi Starplus STS Phones
Programming System Speed Dials On The Executone IDS M18 Phone
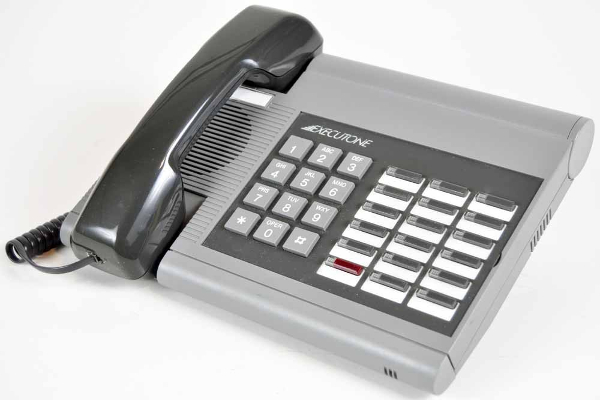 Speed Dial provides an easy way to access and dial phone numbers that are often used. Rather than having to dial the entire number, you can use a speed dial code instead. With the Executone IDS M18 phone, System Speed Dial bin numbers can be up to 3 digits.
With the Executone IDS M18 phone, the system is capable of storing up to 200 System Speed Dial numbers (certain system configurations can store up to 999 numbers) with a maximum of 11 digits for each number.
These System Speed Dial numbers must be programmed from an Operator’s extension. Any telephone number which is frequently dialed by extension users in the system can be programmed by the Operator to provide System Speed Dial as a time saving feature.
In addition, System Speed Dial numbers are not subject to a station’s toll restriction (see note). Therefore, dialing System Speed Dial numbers cannot be prevented by using any of the Forced Account Code features.
Note: In certain system configurations there is a system option which determines whether or not System Speed Dial numbers are subject to a station’s toll restriction.
Program System Speed Dial Numbers At The Operator Station
- Without lifting the handset, press the PROG key or the prog soft key at the Operator station. The PROG key LED lights.
Note: On the TAPI-16 and Agent Terminal, the prog soft key does not have an associated LED. - Press * plus the desired 3-digit bin number (for example, dial 014 for bin 14).
- Dial the desired telephone number (pauses count as one digit). To enter a pause between digits, press *1. Automatic pauses which wait for dial tone are set by pressing *4.
- Press PROG key. Programming ends. Repeat for as many bins as desired.
And that is how you program System Speed Dials for your Executone phone system. For further information, please see your System Administrator.
Visit Startechtel.com to browse our affordable collection of new and refurbished business phones and systems, including quality products from Executone and other top manufacturers. Need help finding a specific product or have a question for our team? Call 800-564-8045 today!
You may also connect with us on Facebook, Google+, Twitter, LinkedIn, and Pinterest.
Posted in Business Communications, Business Phone Systems, Executone, Programming Your Phone System, Refurbished Phones Systems | Comments Off on Programming System Speed Dials On The Executone IDS M18 Phone
Nortel Networks Phone Manual: How to Forward Calls On The Nortel T7208 Phone
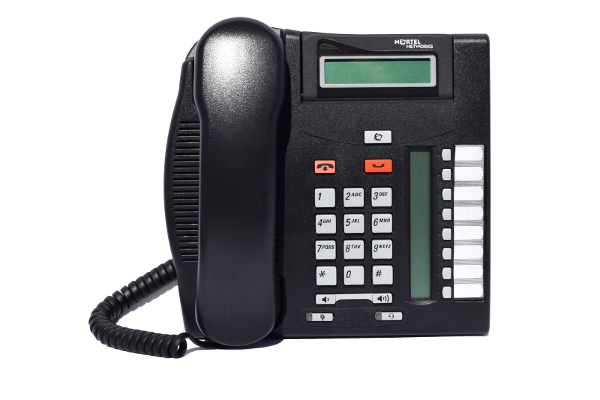 Known for its smart design, ease of use, and dependability over time, the Nortel T7208 phone is an exceptional asset for business offices. Aside from being reliable and affordable, this Nortel Networks phone boasts excellent features, such as call forwarding.
Call forwarding redirects calls to another extension or an external number. The Nortel Networks system supports 3 different types of forwarding: Forward Unconditional, Forward On Busy, and Forward On No Answer.
Forward Unconditional – This forward is used immediately when it is switched on to redirect your calls.
- By default this function is only applied to incoming external calls to you. However, if required, internal calls and/or group calls can also be selected.
- When enabled, all calls matching the settings are forwarded to the number set as the Forward Unconditional destination. That number can be internal or external.
- You can still use the phone to make outgoing calls. When you go off-hook you will hear broken dial tone.
- The Forward On Busy and Forward On No Answer options both use the same separate destination number. However, if that number has not been set, they use the same destination as set for Forward Unconditional.
- If you have voicemail on, the telephone system will attempt to redirect forwarded calls to voicemail if they are still unanswered after having rung for your no answer time (default 15 seconds). This is not always possible for calls that have been forwarded to an external number.
- D = Diverting (Forwarding) Calls – A D is shown on your phone’s idle display when you have Forward Unconditional enabled.
To Turn Forward Unconditional On:
- Press Feature 4.
- The phone prompts you for the number to which you want calls forwarded. If you already had a number set previously, that number is displayed.
- Enter the number to which you want to forward the call. Press * to delete the previous digit.
- If the number matches an internal extension, it is saved automatically. For other numbers, press HOLD to save the number when set as required.
Note: You may use the same process to change the forwarding number – you do not need to switch off forwarding in order to change the forwarding number.
To Turn Forward Unconditional Off:
- Press Feature #4.
Forward On Busy – This forward is used when you have no call appearances buttons available to on which to receive calls, thus, your phone is not able to present you with any more alerting calls.
- By default, this function is only applied to incoming external calls to you. However, if required, internal calls can also be selected.
- When enabled, all calls matching the setting are forwarded to the number set as the Forward On Busy/No Answer destination. That number can be internal or external.
- Busy is defined as having no available call appearance buttons on which further calls can be presented.
- Group calls are not presented when you are busy, and thus, are not forwarded by this setting.
- The Forward On Busy and Forward On No Answer options both use the same separate destination number. However, if that number has not been set, they use the same destination as set for Forward Unconditional.
- If you have voicemail on, the telephone system will attempt to redirect forwarded calls to voicemail if they are still unanswered after having rung for your no answer time (default 15 seconds). This is not always possible for calls that have been forwarded to an external number.
Using A Programmable Button – This function can be assigned to a programmable button. This allows it to be accessed in a single key press. If the button includes an indicator, it will indicate the status of the function (on or off).
Forward No Answer – This forward is used when a call alerts your extension for too long (normal default is 15 seconds) without being answered for some reason.
- By default, this function is only applied to incoming external calls to you. However, if required, internal calls can also be selected.
- When enabled, all calls matching the setting are forwarded to the number set as the Forward On Busy/No Answer destination. That number can be internal or external.
- No answer is defined as having been presented to your phone for your no answer time (default 15 seconds).
- Group calls are not forwarded.
- The Forward On Busy and Forward On No Answer options both use the same separate destination number. However, if that number has not been set, they use the same destination as set for Forward Unconditional.
- If you have voicemail on, the telephone system will attempt to redirect forwarded calls to voicemail if they are still unanswered after having rung for your no answer time (default 15 seconds). This is not always possible for calls that have been forwarded to an external number.
Using A Programmable Button – This function can be assigned to a programmable button. This allows it to be accessed in a single key press. If the button includes an indicator, it will indicate the status of the function (on or off).
Default Short Codes
Short codes are numbers that you can dial from any type of phone on the telephone system. The following are default short codes that may be available on your system.
- Cancel All Forwarding: *00
Switch off any forwarding – includes Forward Unconditional, Forward On Busy, Forward On No Answer, Follow Me, and Do Not Disturb. - Set The Forward unconditional Destination: *07*N#
Set the destination number (N) for Forward Unconditional when it is switched on.- Switch Forward Unconditional On: *01
Switch on Forward Unconditional – a destination must have been set. - Switch Forward Unconditional Off: *02
- Include Group Calls in Forward Unconditional: *50
- Exclude Group Calls from Forward Unconditional: *51
- Switch Forward Unconditional On: *01
- Set the Forward On Busy/No Answer Destination: *57*N#
Set the destination number (N) for Forward On Busy and Forward On No Answer. If no number has been set, those functions will use the Forward Unconditional number if set.- Switch Forward On Busy On: *03
- Switch Forward On Busy Off: *04
- Switch Forward On No Answer On: *05
- Switch Forward On No Answer Off: *06
And that is how you use call forwarding on your Nortel T7208 phone. If you have any further questions, please see your System Administrator.
For smart prices on new and refurbished Nortel Networks phones and equipment, please visit Startechtel.com or call 800-564-8045. You can also connect with us on Facebook, Google+, Twitter, LinkedIn, and Pinterest.
Posted in Business Communications, Nortel Networks, Nortel Norstar Phones | Comments Off on Nortel Networks Phone Manual: How to Forward Calls On The Nortel T7208 Phone
Polycom VVX 400-410 Phone: Navigating Conference Calls
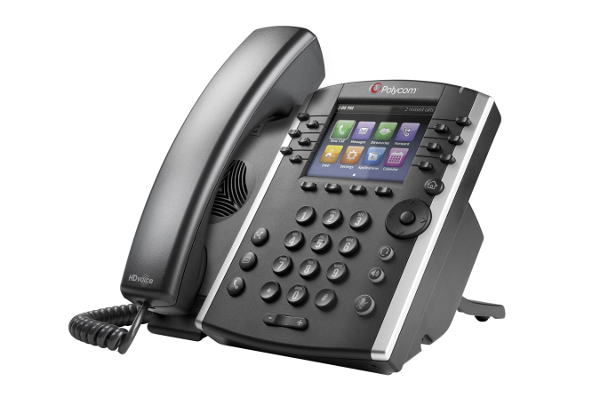 Aside from their sleek design and reliability, the Polycom VVX 400 and 410 phones offer useful features and functions for businesses small and large. Among these excellent features is conference calling, which allows users to connect with multiple parties on the same call. To learn how to use this function on your Polycom phone, follow these steps.
With the Polycom VVX 400 and 410 phones, you may initiate a call with two other people. You may be able to add more than two people depending on your phone system. Please see your System Administrator to find out the maximum number of conference call participants.
You may hold, resume, and split conference calls.
During a conference call, you have access to the conference management feature. This feature enables you to manage each person in the conference call so you can mute, hold, and remove participants. Your System Administrator enables this feature on your phone.
Initiating Conference Calls
You can initiate a conference by calling two people and using the Confrnc soft key or by joining two existing calls using the Join softkey.
To initiate a conference call:
- Call the first person.
- From the Lines or Call view, press More > Confrnc. The active call is held.
- Using the Dialer, call the second person.
- When the second person answers, press More > Confrnc or press Join to add everyone in a conference. The Active: Conference screen displays.
Holding & Resuming Conference Calls
When you place a conference call on hold, you place all the participants in the call on hold. No one in a held conference call can hear each other.
To place a conference call on hold:
- From Lines or Calls view, press Hold. If you’re in Calls view, be sure to highlight the conference first.
- The other two people in the conference are held. The Hold: Conference screen displays.
To resume a held conference call:
- From Lines or Call view, press Resume.
Ending Conference Calls
To end a conference, press End Call. By default, when you press End Call, the other people remain connected unless your System Administrator sets your phone to end all connections when you end a conference call.
To end a conference call:
2. From Lines or Calls view, press End Call.
3. The conference call ends. By default, the other two people remain connected.
Splitting Conference Calls
You can split an active or held conference call. When you split a conference, you end the conference and place the call participants on hold.
To split a conference call:
- From Lines or Calls view, press Split.
- The conference call ends. By default, the other two people are held.
Managing Conference Call Participants
When you initiate a conference call, you can manage call participants in a variety of ways:
- Mute a participant.
- Hold a participant.
- Remove a participant from the conference.
- List information and call details about a participant, such as the participant’s name, number, and whether the call is muted, held, or is video-enabled.
To manage a person in a conference call:
- Set up an active conference call.
- From Active Call, Lines, or Calls view press Manage. If you’re in Calls view, highlight the conference first.
- Use the up and down arrow keys to highlight the person you want to manage.
- Do one of the following:
- Press Far Mute to mute the person. The muted person can hear everyone, but no one can hear the muted person.
- Press Hold to hold the person. The held person can’t hear anyone, and no one can hear the held person.
- Press Remove to remove the person from the conference, end the conference call, and create an active call between you and the person still in the call.
- Press Info to view information about the person and their call status. When you press Info, a popup displays listing the person’s information. You can navigate through the popup using the up and down arrow keys.
- Press Back to exit the conference management function.
And that’s how you use the conference call feature on your Polycom phone. For further questions, please see your System Administrator.
Browse our vast selection of business phones and telephone equipment from Polycom and other top manufacturers at Startechtel.com. To speak with us directly, please call 800-564-8045. You can also connect with us on Facebook, Google+, Twitter, LinkedIn, and Pinterest.
Posted in Business Communications, Business Phone Systems, Conference Phones, IP/VoIP Phones, VoIP Phone Systems | Comments Off on Polycom VVX 400-410 Phone: Navigating Conference Calls
The Hold Feature On The NEC DSX Phone System
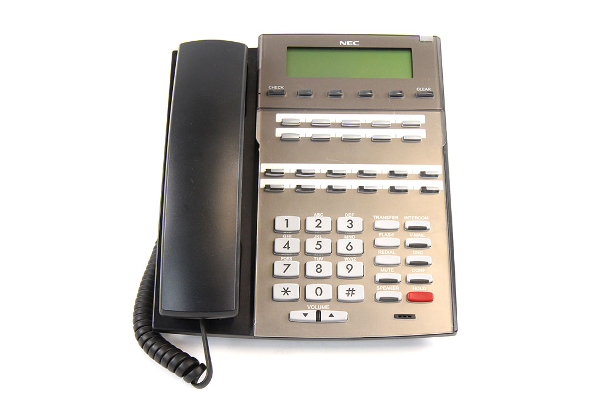 Proven reliable and cost-effective, NEC DSX business phones make great additions to business offices both small and large. Whether you choose the NEC DSX 22-Button or 34-Button phone, you are sure to be pleased with its excellent performance and convenient features. Although seen as a basic feature, Hold can be extremely helpful in various situations.
The Hold feature lets an extension user put a call in a temporary waiting state. The caller on Hold may hear silence or Music on Hold, but not the conversation in the extension user’s work area. While the call waits on Hold, the extension user may process calls or use a system feature. Outside calls left on Hold too long recall the extension that placed them on Hold. If the recall is unanswered, the call diverts to Key Ring.
There are 4 types of Hold:
- System (Regular) Hold
With System Hold, an outside call a user places on Hold flashes the line key (if programmed) at all other keysets. Any keyset user with the flashing line key can pick up the call.
- Exclusive Hold
When a user places a call on Exclusive Hold, only that user can pick up the call from Hold. The line appears busy to all others keysets that have a key for the line. Exclusive Hold is important if the user doesn’t want a co-worker picking up their call on Hold.
- Automatic Hold
Automatic Hold allows a user to be on an outside call, activate a feature, and automatically place the call on Hold without first pressing the HOLD key. The system places a call on Hold automatically, when the user presses CONF, INTERCOM, or a Hotline key. Automatic Hold optionally allows a user, busy on an outside call, to press another line key or a Call Coverage Key to automatically put their initial call on Hold.
- Intercom Hold
A user can place an Intercom call on Hold. The Intercom call on Hold does not indicate at any other extension. There is no Hold Recall for Intercom calls.
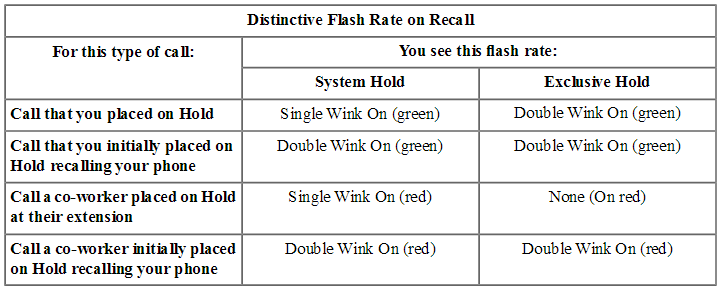
Distinctive Flash Rate On Recall
System Hold and Exclusive Hold recall feature a distinctive flash rate for line keys (see chart). This allows the keyset extension user to easily differentiate new calls that are ringing from held calls that are recalling.
To learn more about the Hold feature and other functions of your NEC DSX phone, please see your System Administrator. For a vast selection of NEC phones and other telephone systems and equipment, please visit Startechtel.com or call 800-564-8045. You may also connect with us on Facebook, Google+, Twitter, LinkedIn, and Pinterest.
Posted in Business Communications, Business Phone Systems, NEC Business Phones | Comments Off on The Hold Feature On The NEC DSX Phone System
Basic Call Functions Of The Mitel 5330E IP Phone
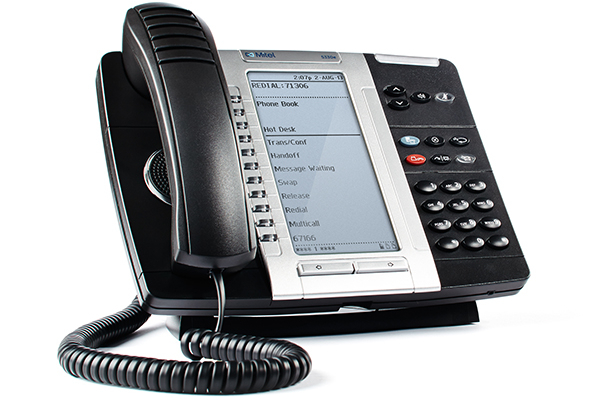 The Mitel 5330E IP Phone boasts a large backlit display with auto-dimming, along with 24 programmable, multi-function, self-labeling keys. This enterprise class telephone is ideal for businesses that experience large call volumes and rely on telephone communications to connect with clients and customers. If you are looking to upgrade or replace your current business phones, the Mitel 5330E IP phone is a smart choice. Learn how easy it is to answer and make calls on this Mitel phone by following these steps.
Answering Calls
Lift the handset or press Speaker to answer a call while using a headset or to answer a call in Handsfree Mode.
Placing Emergency Calls
Dial the emergency number (911 U.S. or 999/112 Europe). The system immediately places the emergency call as soon as you dial the number, even if you do not select an outside line.
Placing Internal (Intercom) Calls
With or without the handset lifted, dial the extension number. If you enter incorrect digits, you can press Hold to move the cursor backward, deleting the last digits entered. If you are using Handsfree Mode, listen for the double tone, and then begin to speak.
Placing External Calls
Press the Outgoing button, and unlit Call button, or enter the Outgoing Call access code (8 is the default code), and then dial the number.
Redialing External Numbers
With or without the handset lifted, press Redial. The system automatically selects a line and dials the number.
Transferring Calls To Other Extensions
While on the call, press Transfer, and then enter the extension number. Then you may do one of the following:
- Wait for an answer, announce the call, and then hang up. If the extension is unavailable, press the flashing IC or Call button to return to the caller.
- Hang up to transfer the call and disconnect the call from your IP phone.
Forwarding Calls
- Press the Fwd button, and then enter the feature code, if applicable. “ENTER FORWARD DEST” appears.
- Enter the extension number, or press the Outgoing button or enter the Outgoing Call access code (8 is the default code), and then dial the telephone number.
And that it’s it! If you have any further questions, please see your System Administrator.
For affordable prices on Mitel phones, like the Mitel 5330E IP phone, and other quality business phones, please visit Startechtel.com. For the latest news and updates, connect with us on Facebook, Google+, Twitter, LinkedIn, and Pinterest.
Posted in Business Communications, IP/VoIP Phones, Mitel Phones | Comments Off on Basic Call Functions Of The Mitel 5330E IP Phone
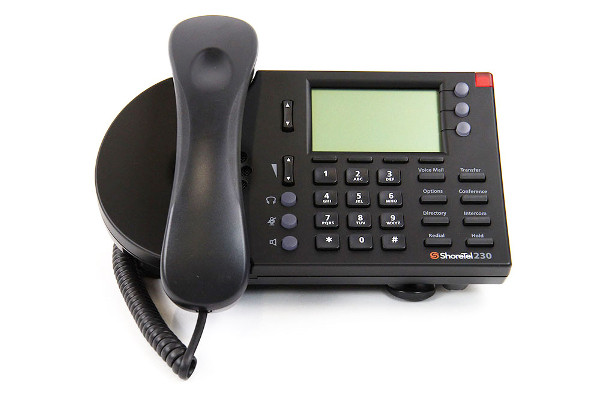
ShoreTel 230 IP Phone: Accessing Voicemail
 Never miss an important call or message when you set up your voicemail system. Whether you are out of the office, away from your desk, in a meeting, or simply on another call, your voicemail will record the important voice message and allow you to review, reply, or forward the voicemail as necessary.
If you have the ShoreTel 230 IP phone, a steady flashing light one your phone’s right-most upper corner and stutter dial tone will signify that you have unheard messages. The number of unheard messages will be displayed on your phone’s idle screen next to the voicemail icon. To learn how to access your voicemail and interact with voice messages, follow these steps.
Logging Into The Main Menu
To log in to the main voicemail menu, press the Voice Mail button and then dial your password followed by #. (Your default password is 1234.)
Logging In From Another Extension
To log in to the main voicemail menu from another extension, press the Voice Mail button, followed by #, then your extension, followed by your password, and then #.
To log in to the main voicemail menu from an analog phone, press # #, then your extension, followed by your password, and then #.
Logging In From An External Phone
To log in to the main voicemail menu from an external phone, dial the voice mail access number provided by your System Administrator, press #, then your extension, then your password, followed by #.
Listening To & Interacting With New Messages
From the Main Menu, you can listen to and replay new messages by pressing 1. To interact with new messages, press:
1 to Replay the message
2 to Save the message
3 to Delete the message
4 to Forward the message
- After recording the prefacing remark, press: # if correct, 1 to review, 2 to re-record, or * to cancel recording.
- After addressing the message, press 1 to mark it urgent, or simply hang up to send the message.
5 to Reply to the message
- Choose one of the following options: 1 to reply with a voice message, 2 to reply with a call back, or * to return to the previous menu.
6 to hear Envelope Information (time and date sent)
7 to Move Backward
- While listening to a message, you may “rewind” to several second earlier in the message.
8 to Pause
9 to Move Forward
- While listening to a message, you may “fast forward” to several seconds later in the message.
0 followed by 0 to Transfer to Assistant
- While listening to a message, you may contact the assistant to inquire or share information about a voicemail.
# to Continue to the next message
* to Cancel message review
Sending Messages From Voicemail
From the Main Menu, you can send messages by pressing 2. The following options are available while recording your message:
* Cancel
# Done recording
1 Review
2 Re-record
After you are satisfied with your recording, you will be prompted to enter the recipient’s extension. At this time, you have the option to press:
0 for additional addressing options
1 Look up recipient by name in a directory
2 Specify a personal distribution list
3 Broadcast to all extensions
* Cancel addressing options
After the message is addressed, if desired, you can press 1 to mark/unmark urgent or 2 to request a return receipt.
Listening To Saved Messages
From the Main Menu, you can listen to saved messages by pressing 3. To interact with saved messages, press any one of the options under “Listening To & Interacting with New Messages” (except for option 2) above.
Mailbox Options
Press 7 to access various options for your personal mailbox, and then press one of the following:
1 Record Personal Greeting
- Note: When you record a personal greeting, it is linked to the current active call handling mode.
- Record your personal greeting for the current active call handling mode at the tone and press #, then select from the following options: # to Accept, 1 to Review, 2 to Re-record, 3 to Delete, * to Cancel.
2 Choose Call Handling Mode
- For more information on call handling, see your System Administrator. The following modes and options are available: 1 – Standard, 2 – In A Meeting, 3 – Out Of The Office, 4 – Extended Absence, 5 – Custom, or * – Cancel.
3 Reassign Extension
- If you have the proper permission, you can assign your extension to any phone. The following options are available:
1 Assign the extension (Note: If you assign your extension to a phone that is normally occupied by another user, calls to the original user’s extension will go to the forwarding destination as defined by their active Call Handling Mode.)
2 Unassign the extension (the phone reverts to the extension originally assigned to it)
3 To assign your extension to your last external number
4 Set Your Password
- Enter your new password, followed by # and repeat to confirm. Press * to cancel.
5 Disable/Enable Envelope Information
- Use this option to turn on/off the envelope information which contains the date/time of the message, caller ID and/or the recorded name of the person who left the voicemail message.
6 Record Your Name
- Press # when you are finished recording your name, then choose from the following: # – Accept, 1 – Review, 2 – Re-record, 3 – Delete and use default system recording, or * – Cancel.
7 Listen To Your Deleted Messages
- As a safeguard against accidental erasures, the system retains deleted messages for a few hours. To listen to your deleted messages, press 7. Voicemail plays all the deleted messages still available to the system. During playback, you can manage deleted messages as if they were newly arrived messages. Press 2 to restore the deleted message to a saved message.
8 Remove Deleted Messages
- Press 1 to Confirm or press * to Cancel.
9 Additional Options
The following additional options are available:
1 Enable or disable Outlook automated call handling
2 Change email delivery options: 1 – Disable email delivery, 2 – Enable email delivery, 3 – Enable email delivery with voice message attached, or 8 – Mark voice messages heard after email delivery.
3 Change agent state: 1 – Log in and assign extension, 2 – Log out, or 3 – Log in without assigning extension.
5 Change Find Me forwarding state: By enabling Find Me, callers who are routed to your voice mail box can be instructed to press 1 and the voicemail system will call you at one of two possible numbers where you can be located. To set the Find Me destinations, use Personal Call Manager or Web Access. Press 1 to Enable or press 2 to Disable.
* Previous menu
* Cancel Current Operation
More Options
8 Log Off
9 Return To Auto-Attendant
0 Transfer To Assistant
# Hear Mailbox Status (select this option to hear the number of unheard messages).
And that is how you access and utilize your voicemail system via the ShoreTel 230 IP phone. If you have further questions, please see your System Administrator.
To purchase the ShoreTel 230 IP phone or any of our other new and refurbished business phones and phone systems, please visit Startechtel.com or call 800-564-8045. For the latest news and updates, connect with us on Facebook, Google+, Twitter, LinkedIn, and Pinterest.
Posted in Business Communications, IP/VoIP Phones | Comments Off on ShoreTel 230 IP Phone: Accessing Voicemail
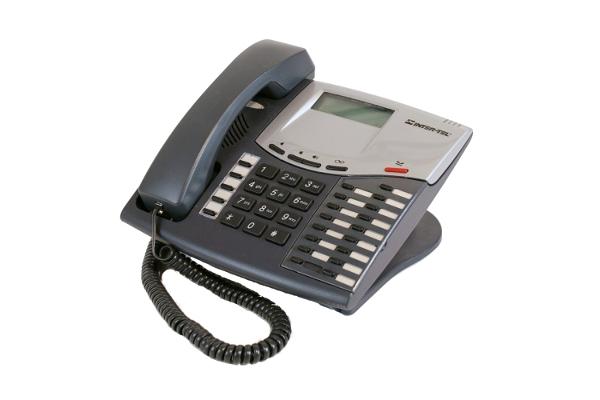
Transferring Calls On The Intertel Axxess 550.8520 Phone
 Call transfer allows you to redirect a call to the appropriate phone line. For businesses, this can greatly improve customer service as callers can be expediently directed to the department or team member they need.
Transferring calls is often considered a basic function, however, on the Intertel Axxess 550.8520 phone, there are also advanced options for this feature. These options include transferring calls to another extension, voice mail, or even an outside line. Follow along as we break down the steps to complete these tasks.
Transfer Calls To Another Extension
- You may press TRANSFER or press ∞ and dial 346 to place the call on hold at the other phone.
- Dial the desired extension number.
- Wait for an answer, announce the call, and then hang up. If the number is busy, there is no answer, or the transfer is refused, press the flashing key to return to the caller.
Note: If you are receiving a transferred call and the Transfer-To-Connect option is enabled for your phone, you are automatically connected to the transferred caller once the transferring party hangs up. If this option is disabled, you must press a CALL key to answer the transferred call.
Transfer Calls To Voice Mail
- Press TRANSFER.
- Dial the voice mail extension number.
- You may either dial the desired mailbox number and hang up, or hang up and send the call to the voice mail menu (so that the caller can select the mailbox number).
Transfer Calls To An Outside Number
- Press TRANSFER.
- Select an outgoing line and dial the desired telephone number.
- Wait for an answer, announce the call, and then hang up. If the number is busy, there is no answer, or the transfer is refused, press the flashing key to return to the caller.
To Pick Up (Reverse Transfer) A Call
- Lift the handset and dial 4.
- Dial the extension or hunt group where the call is ringing or holding.
Note: If the Group Call Pickup feature is enabled, you can pick up a call ringing at any station in a hunt group by dialing the hunt group’s extension number (available in versions 5.2 and later).
And that is how you transfer calls on the Intertel Axxess 550.8520 phone. For further information, please see your System Administrator.
For affordable prices on quality new and refurbished telephones, phone systems, and equipment, shop our extensive stock online at Startechtel.com or call 800-564-8045 today! You can find us on Facebook, Google+, Twitter, LinkedIn and Pinterest as well.
Posted in Business Communications, Business Tips, Intertel Phones | Comments Off on Transferring Calls On The Intertel Axxess 550.8520 Phone
Accessing Voicemail On The Aastra 6731i IP Phone
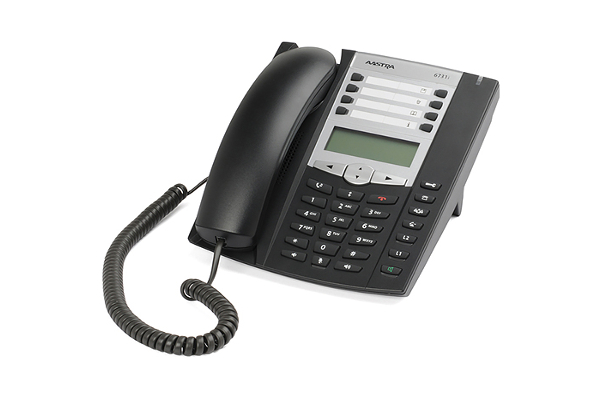 The Aastra 6731i IP phone offers advanced features, including 10 fixed feature keys, HD wideband audio and full duplex speakerphone and integrated headset jack. Boasting a practical design and affordable price, you should consider upgrading to this excellent phone.
One of the most important features of this phone is the Aastra voicemail. Voicemail allows callers to leave you messages should miss an important call.
To access your voicemail from your own phone, press the Voicemail key (if available) or dial *98 and press the right arrow (►) key.
You may also access your voicemail remotely by:
- Calling The Main Automated Attendant Phone Number
- Dial the main Automated Attendant phone number of your company.
- You will be requested to enter the extension of the person you are calling.
- Dial 6 + your extension number (ex. If your extension number is 204, then you must dial 6205).
- Let the call go to your voicemail.
- Once you hear your voicemail greeting, press the star (*) key. You will then be prompted to enter your voicemail password.
- Calling Your Direct Phone Number
- Dial your direct phone number.
- Let the call go to your voicemail.
- Once you hear your voicemail greeting, press the star (*) key. You will then be prompted to enter your voicemail password.
- Calling From Another Extension
- Dial 6 + your extension number.
- Let the call go to your voicemail.
- Once you hear your voicemail greeting, press the star (*) key. You will then be prompted to enter your voicemail password.
And that is how you access your Aastra voicemail. Please see your System Administrator for further information.
For a great selection of new and refurbished business phones from top manufacturers like Aastra, please visit Startechtel.com or call 800-564-8045. You can also connect with us on Facebook, Google+, Twitter, LinkedIn, and Pinterest.
Posted in Aastra phones, Business Communications, IP/VoIP Phones, VoIP Phone Systems | Comments Off on Accessing Voicemail On The Aastra 6731i IP Phone
Holding Calls On The Nortel M7310 Phone
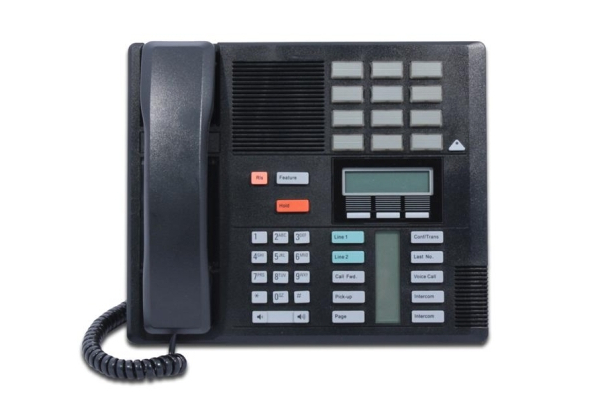 If you’re looking for a reliable desk phone that offers quality design and smart features, the Nortel M7310 phone is the one for you. Designed for more extensive call handling, the Nortel M7310 phone is ideal for users who are constantly making and receiving calls.
High call volumes make the Hold feature very important. Placing a call on hold affords you time to look up information, create a conference call, or transfer the call to the appropriate party. To learn how to use the Hold feature on the Nortel M7310 phone, follow these steps.
In general, you can hold as many calls as your phone can receive.
- The held call will still occupy the call appearance on which it was made or answered.
- While held, the caller will hear music on hold. If your system does not have music on hold available, the caller will hear double beep tones every few seconds.
- If you have more than one call on your phone, either held or connected, you can start a conference between yourself and the calls.
Calls that you have held will recall to your phone when it is idle if they have been on hold for too long. The default hold timeout for the telephone systems is 15 seconds, but can be changed by the System Administrator. Hold recall calls ignore any Forwarding or Do Not Disturb settings you have set.
Please Note: You can hold a conference call in the same way as holding a normal call. Holding the conference call does not affect the other conference parties who can continue talking. You will also still be listed as a member of the conference call in the conference details.
- Warning: This only applies to conference calls hosted by your own telephone system. Holding your call to a conference hosted on another telephone system will cause the conference to hear your system’s music on hold.
Holding A Call
- To put your current call on hold, press the Hold button or the call’s appearance button.
- The held call will be indicated by its appearance key changing to a fast flashing SOLID TRIANGLE (▲) icon.
- While held, the caller will hear music on hold. If your system does not have music on hold available, the caller will instead hear double beep tones every few seconds.
Taking A Call Off Hold
If you have a currently connected call, that call will be automatically put on hold.
- Press the appearance button with the fast flashing ▲ icon.
Switching Between Calls
You can switch between calls by pressing the call appearance button of the call to which you want to talk. The button indicators will show which call you are currently talking to.
- A slow flashing ▲ icon indicates a call waiting to be answered.
- A steady ▲ icon indicates the currently connected call.
- A fast flashing ▲ icon indicates a held call.
Transferring A Held Call
When you already have a call on hold and a call connected, you can connect them by starting a conference. Press FEATURE 3. Your current call and the held call will be connected. You can now drop yourself from the conference.
And that is how you use the Hold feature on the Nortel M7310 phone. Please see your System Administrator for further information.
To find the Nortel M7310 phone for a smart price, or to browse other new and refurbished business phones, please visit Startechtel.com. If you have any questions about our products or would like to speak with a representative, please call 800-564-8045. You can also connect with us on Facebook, Google+, Twitter, LinkedIn, and Pinterest.
Posted in Business Communications, Nortel Networks, Nortel Norstar Phones | Comments Off on Holding Calls On The Nortel M7310 Phone


